Ready to get started? The Faculty Quick Start Guide walks you through setup, student introductions, and ways to encourage use throughout the term.Documentation Index
Fetch the complete documentation index at: https://support.nectir.io/llms.txt
Use this file to discover all available pages before exploring further.
Create a Group
Only Workspace Owners and Editors can create Groups.
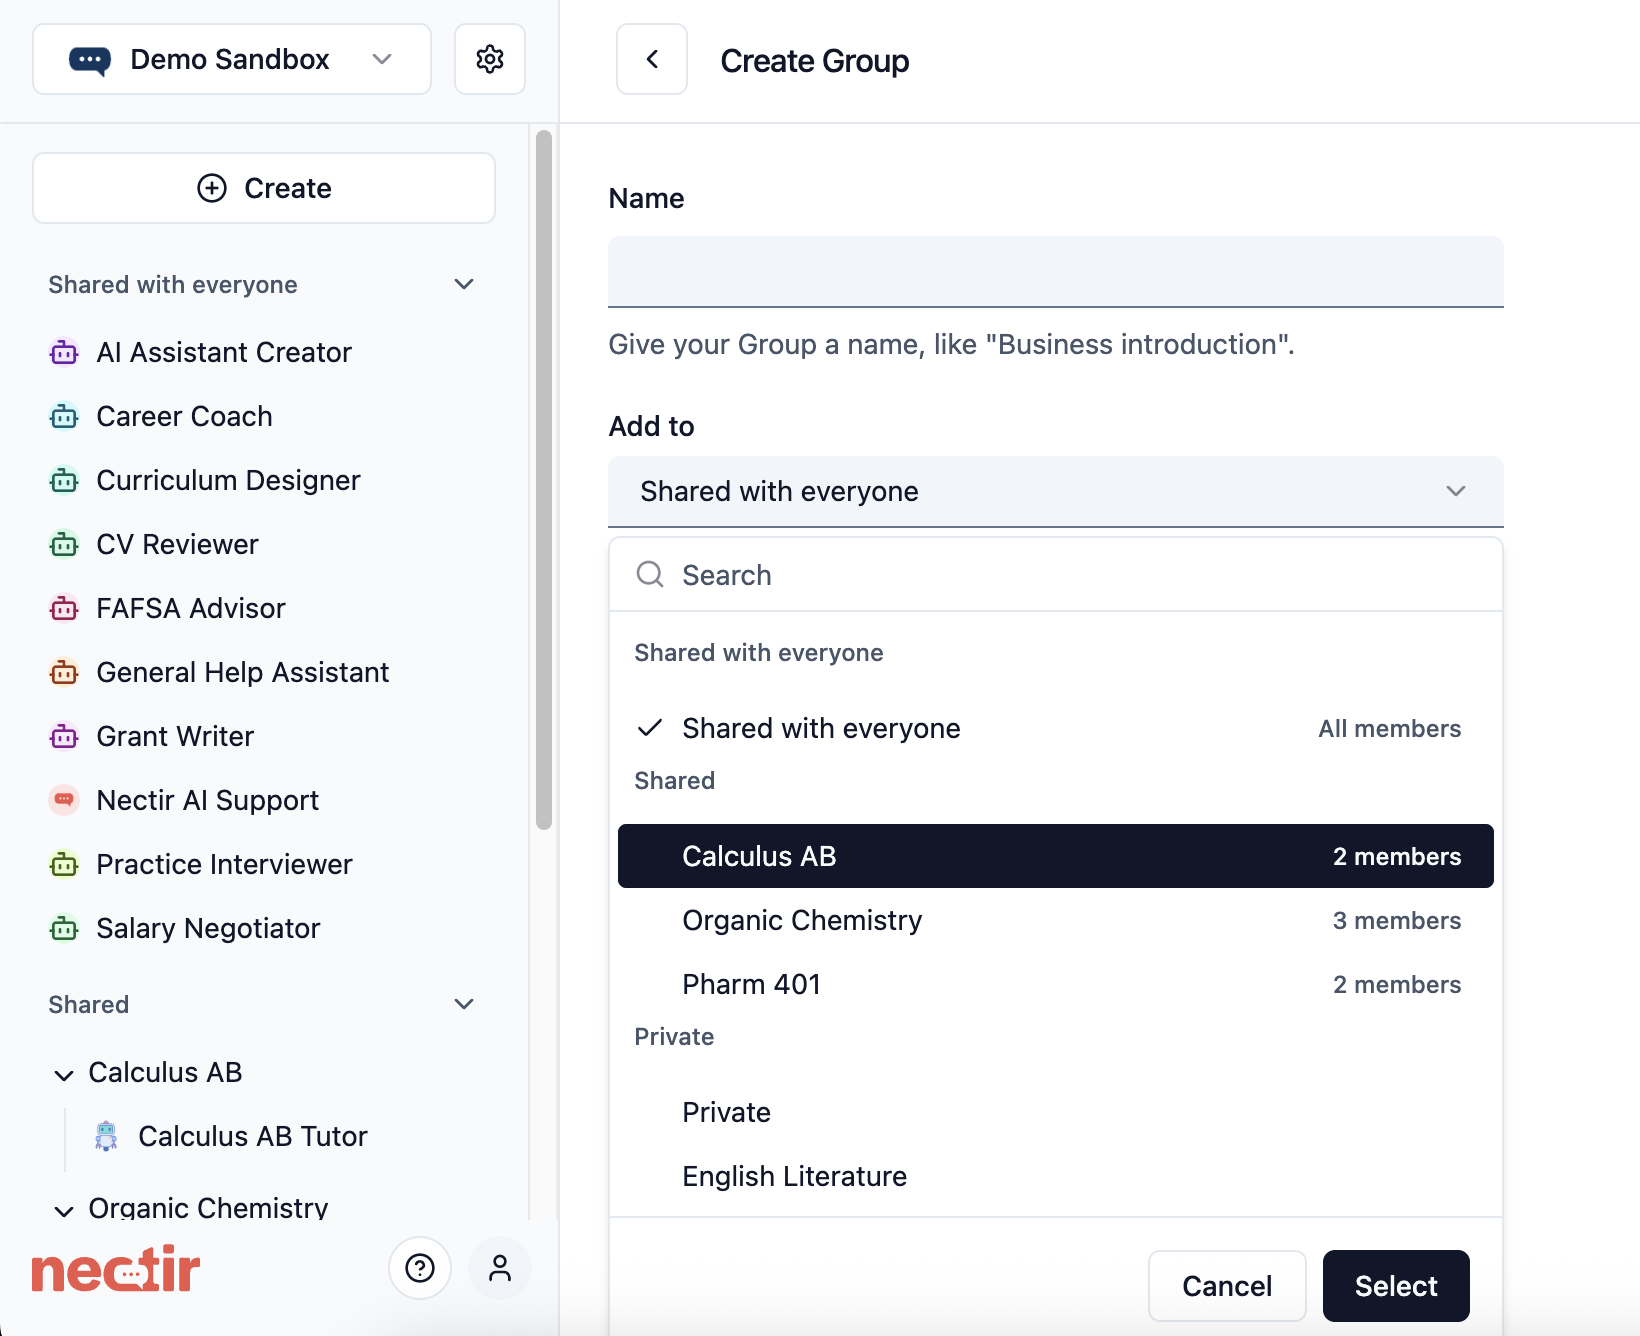
Select Where to Place Your Group
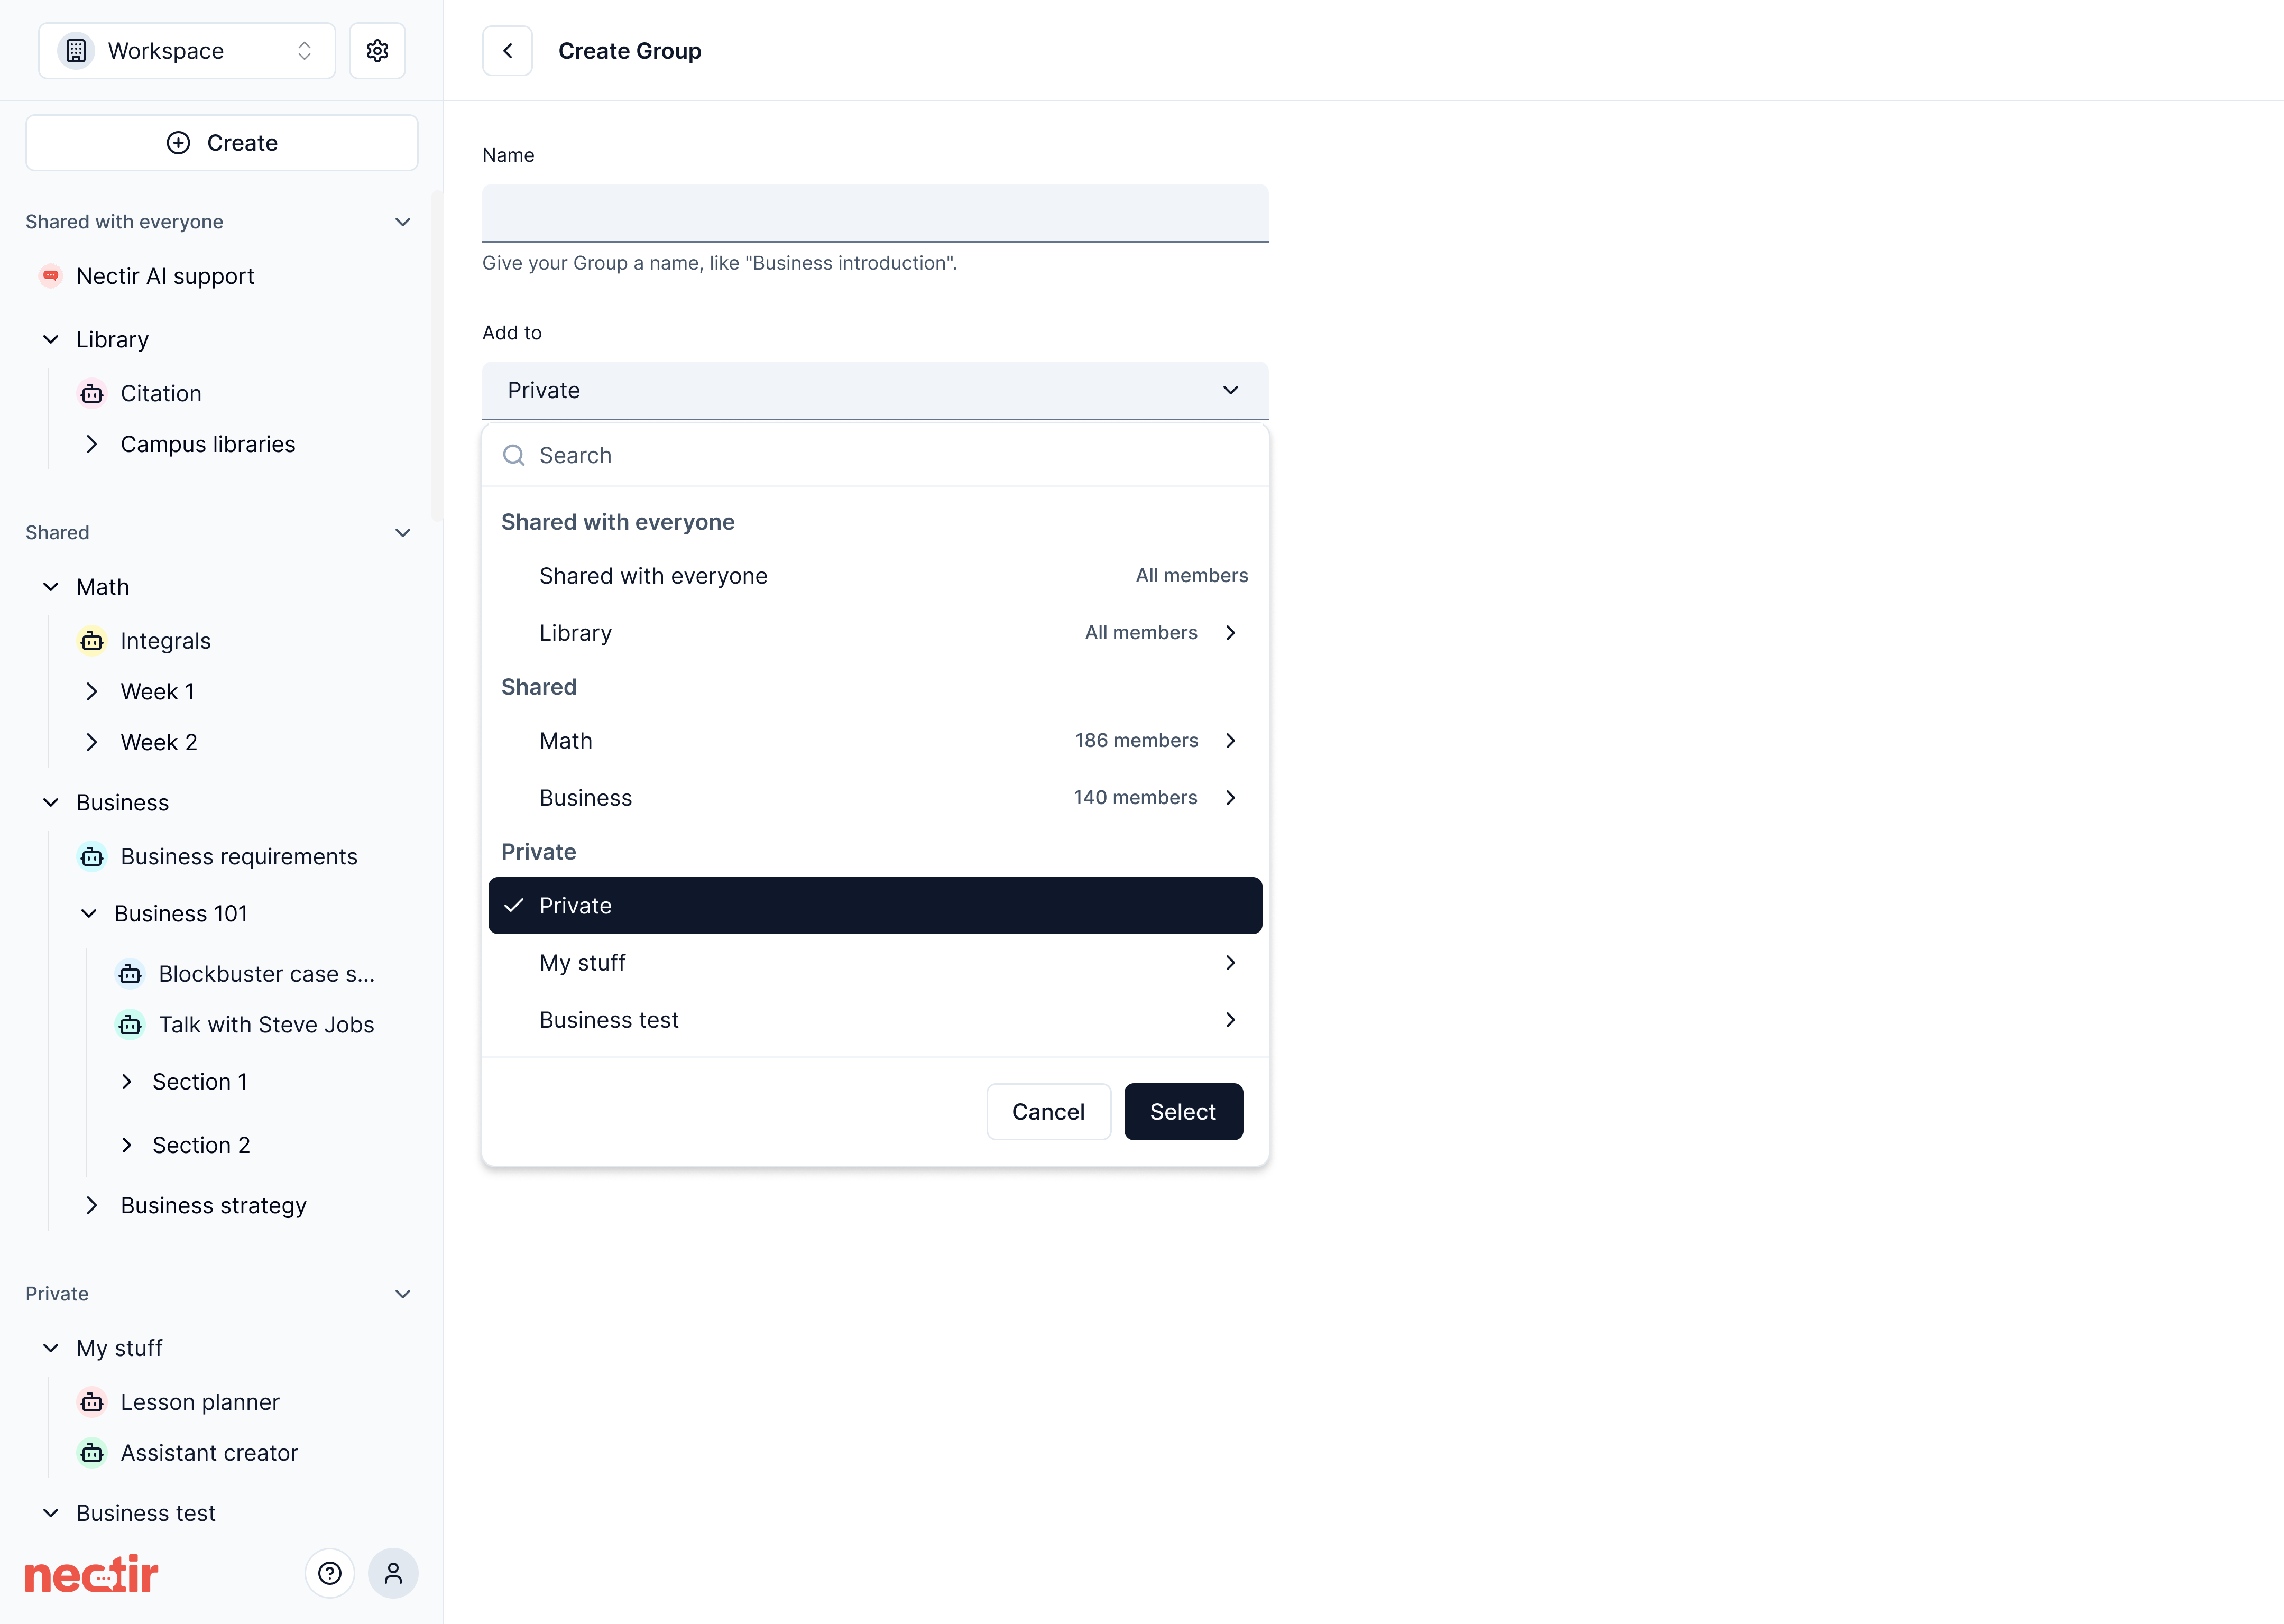
Use the dropdown menu to select where you want to create your Group:
- Shared with everyone - Creates a Group shared with everyone in the workspace
- Inside any existing Group - Creates a nested Group that inherits the parent’s sharing settings
- Private - Creates a private Group visible only to you (for Workspace Owners and Editors only)
Duplicate a Group
You can duplicate an existing Group to create a new Group with the same structure and Assistants.What Happens When You Duplicate a Group
Group Copy
A new Group with the same name plus “Copy” will be created
Assistants
All Assistants from the original Group will be duplicated
Settings
Group and Assistant settings will be preserved, but members will not be duplicated
Ownership
You will be the Owner of the new Group
When to Use Group Duplication
- Create a template for different course sections
- Save a backup before making major changes
- Set up a new version for a new semester
- Create a testing environment for new configurations
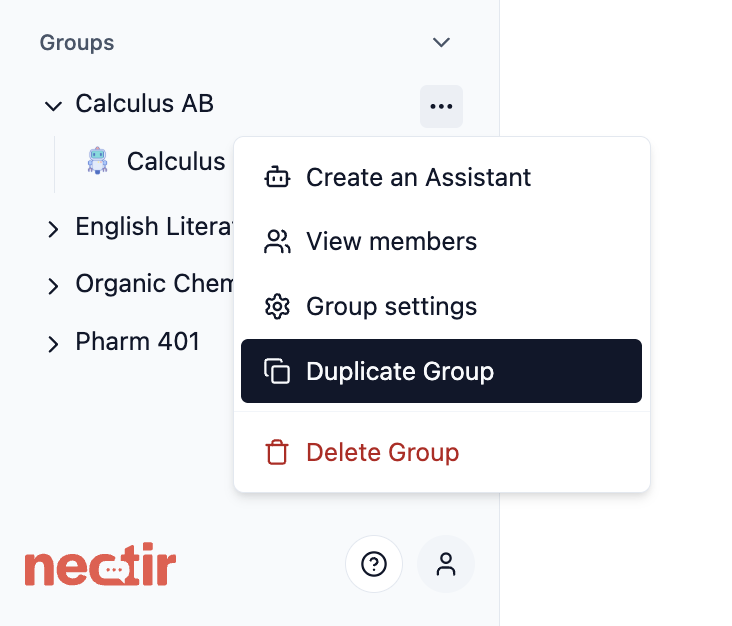
How to Duplicate a Group
Only Group Owners and Workspace Owners/Editors can duplicate Groups.
Manage a Group
Once you’ve created or duplicated a Group, you can manage its settings, members, and content.General Settings
General Settings
Access and modify basic Group information and structure.
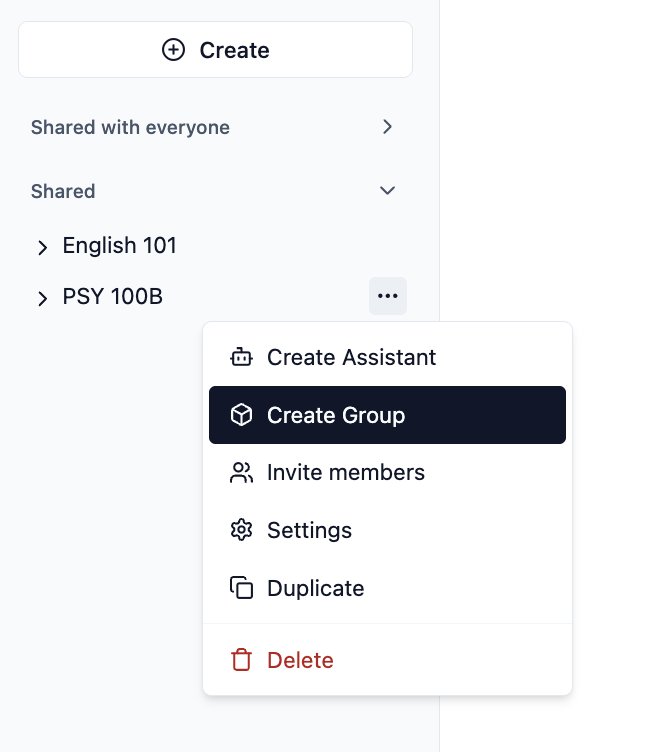
- Hover over the Group on the left sidebar and click the three dots menu
- Select Settings
- In General Settings, you can:
- Change the Group name: Update the display name
- Move to nested structure: Add this Group as a nested Group under any existing Group you have access to
- Click Save changes to apply your updates
Manage Group Members
Manage Group Members
Control who has access to your Group and their permission levels.
- Hover over the Group on the left sidebar and click the three dots menu
- Select Invite members
- From here you can:
- Invite new members: Click Invite members to add users via email or invitation link
- Change roles: Modify member permissions (Owner, Facilitator, Member)
- Remove members: Click Remove next to any user’s name
LMS Integration
LMS Integration
If your institution has LMS integration set up for this Group, you can sync your course roster to import user names and send invitation emails.To access roster sync:
- Access Settings from the three dots menu
- Navigate to the LMS Integration section
- If a course is listed, hover over the three dots next to the course name and click Roster Sync
Note: Roster sync does not control access. Once your LMS course is linked to a Group, users can access Nectir AI through the LMS regardless of whether they’ve been roster synced. For complete information, see Roster Sync.
Nested Groups
Nested Groups allow you to create hierarchical structures, organizing your content like folders within folders.Purpose of Nested Groups
Departmental Organization
Create a main department Group with nested Groups for specific courses, research teams, or administrative units
Course Management
Set up a primary course Group with nested Groups for different sections, lab groups, or project teams
Multi-level Institutions
Structure your workspace with Groups for colleges/schools, departments, and individual programs in a hierarchical structure
Special Projects
Maintain a primary Group for a project with nested Groups for specialized workstreams or milestone-based teams
How to Create Nested Groups
Select Parent Group
In the dropdown menu, choose the existing Group where you want to create the nested Group
Permission Inheritance: Users with access to a parent Group automatically have access to all nested Groups within it. Their role permissions remain consistent throughout the hierarchy unless specifically modified for a nested Group.
Managing Parent Group Members
Learn how to view, sync, and manage members inherited from parent Groups in your nested Groups.
Private Space for Development
- Create Groups and Assistants visible only to them
- Test and refine Assistants before making them available to users
- Develop content without interrupting regular Workspace activities
Next Steps
Create an Assistant
Create your first AI Assistant within your new Group
Invite Users
Add members to your Group with appropriate permissions
Video Tutorial
See Group Creation in Action
Watch how to create your first Group and manage user permissions