> ## Documentation Index
> Fetch the complete documentation index at: https://support.nectir.io/llms.txt
> Use this file to discover all available pages before exploring further.
# LTI Guided Setup
> Install and configure the Nectir AI LTI integration in Canvas
This guide is intended for LMS administrators. If you encounter any issues during the integration process, please contact [support@nectir.io](mailto:support@nectir.io).
## Canvas LTI Setup
This guide walks you through installing and configuring the Nectir AI LTI app in Canvas. Once complete, instructors across your Canvas instance can launch Nectir AI from the course navigation and embed Nectir Assistants directly in modules, assignments, and the Rich Content Editor.
Already have Nectir AI installed and want to turn on functionality added since your original setup? See [Update Your Canvas Integration](/lms-integrations/canvas-lti-updates). This guide always reflects the current, complete configuration, so a fresh install needs nothing extra.
### Before You Begin
You'll need three browser tabs open:
* **Canvas** with admin access at the account level where you want to install Nectir AI
* **Nectir AI** with the Workspace you want to integrate
* **This support article** to follow along with the steps below
### Install the App in Canvas
1. In Nectir AI, go to **Workspace settings** > **LMS integration** > **Add integration** > **Canvas** > **LTI integration**
2. Copy the JSON configuration shown.
3. In Canvas, navigate to the **Admin** panel
4. Go to **Apps**
5. Select the **Manage** tab
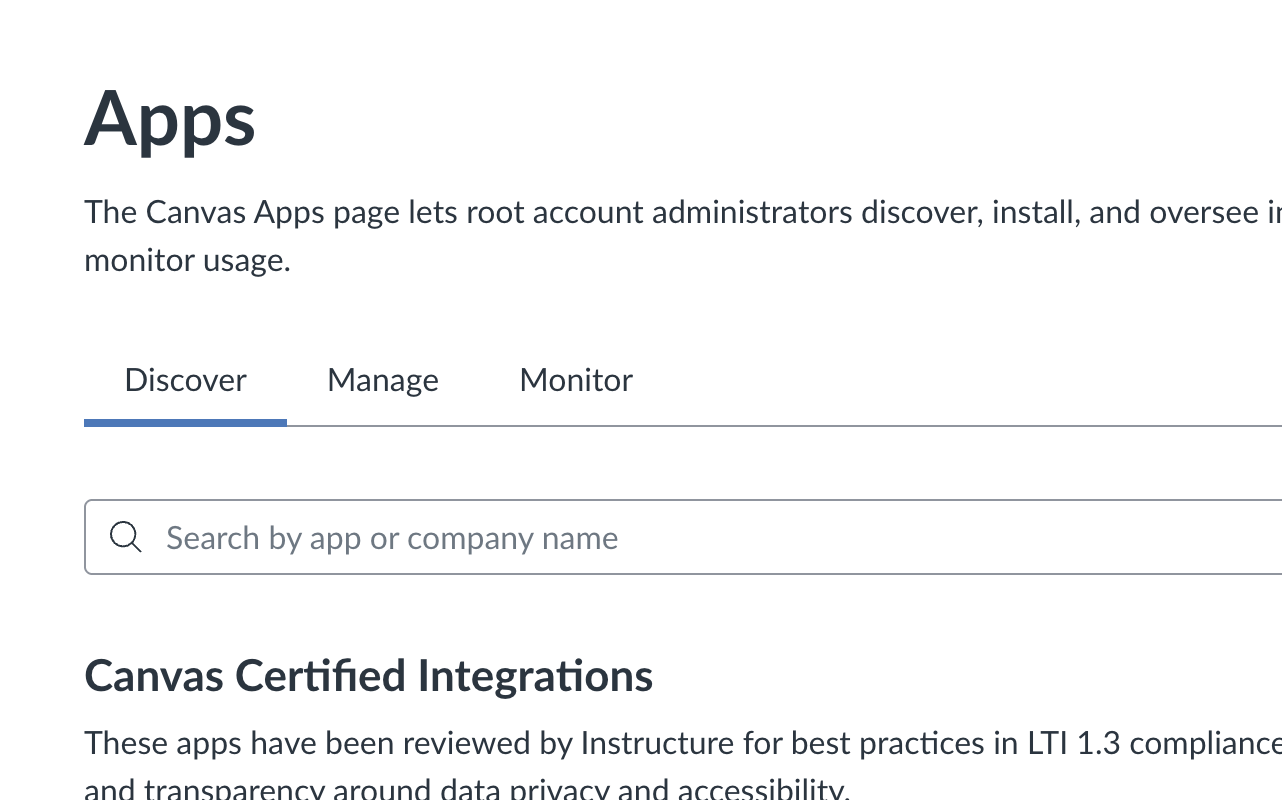 6. Select **Install a New App**
7. In the **Install Method** dropdown, select **JSON**
6. Select **Install a New App**
7. In the **Install Method** dropdown, select **JSON**
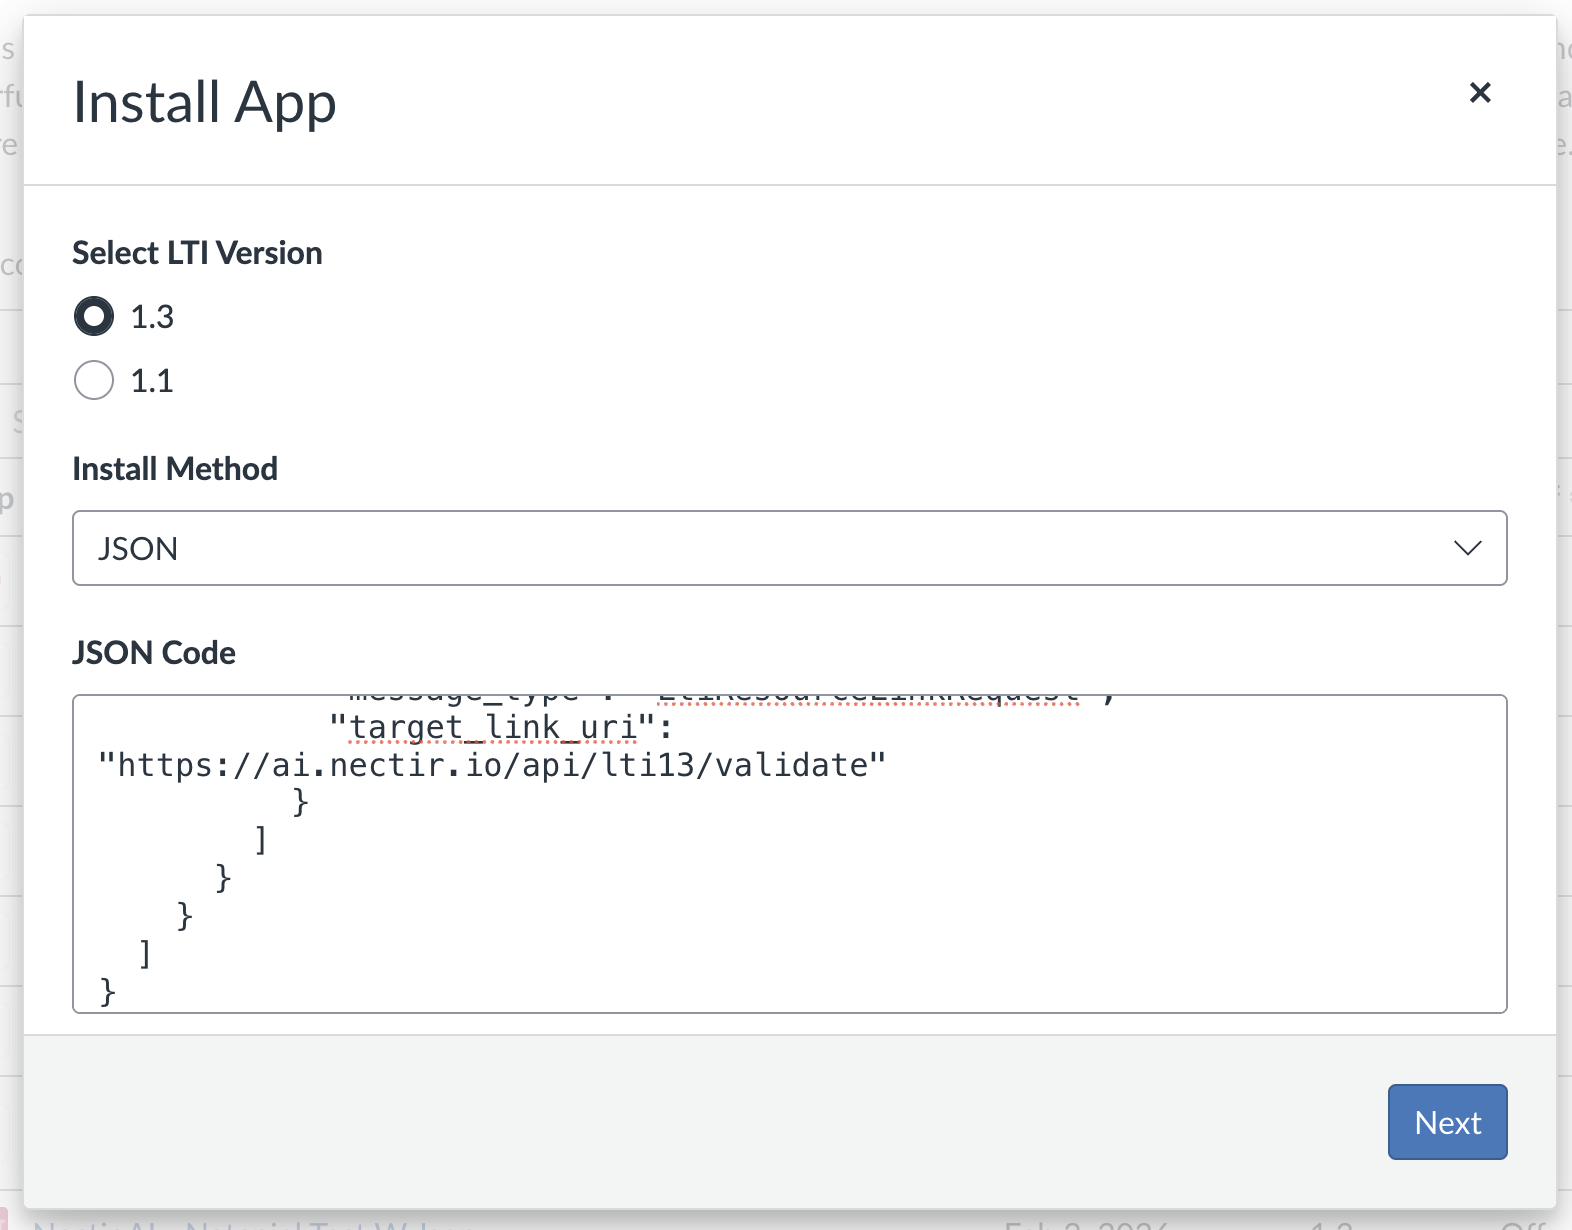 8. Paste the JSON you copied from Nectir AI into the configuration field
9. Select **Next** through the sections (these are automatically configured from the JSON).
If you're installing multiple Nectir AI apps for different schools, you can add a Nickname in the **Nickname** section to distinguish between them (for example, `Nectir AI - Your Institution`)
10. Select **Install App**
8. Paste the JSON you copied from Nectir AI into the configuration field
9. Select **Next** through the sections (these are automatically configured from the JSON).
If you're installing multiple Nectir AI apps for different schools, you can add a Nickname in the **Nickname** section to distinguish between them (for example, `Nectir AI - Your Institution`)
10. Select **Install App**
 ### Enable the App in Canvas
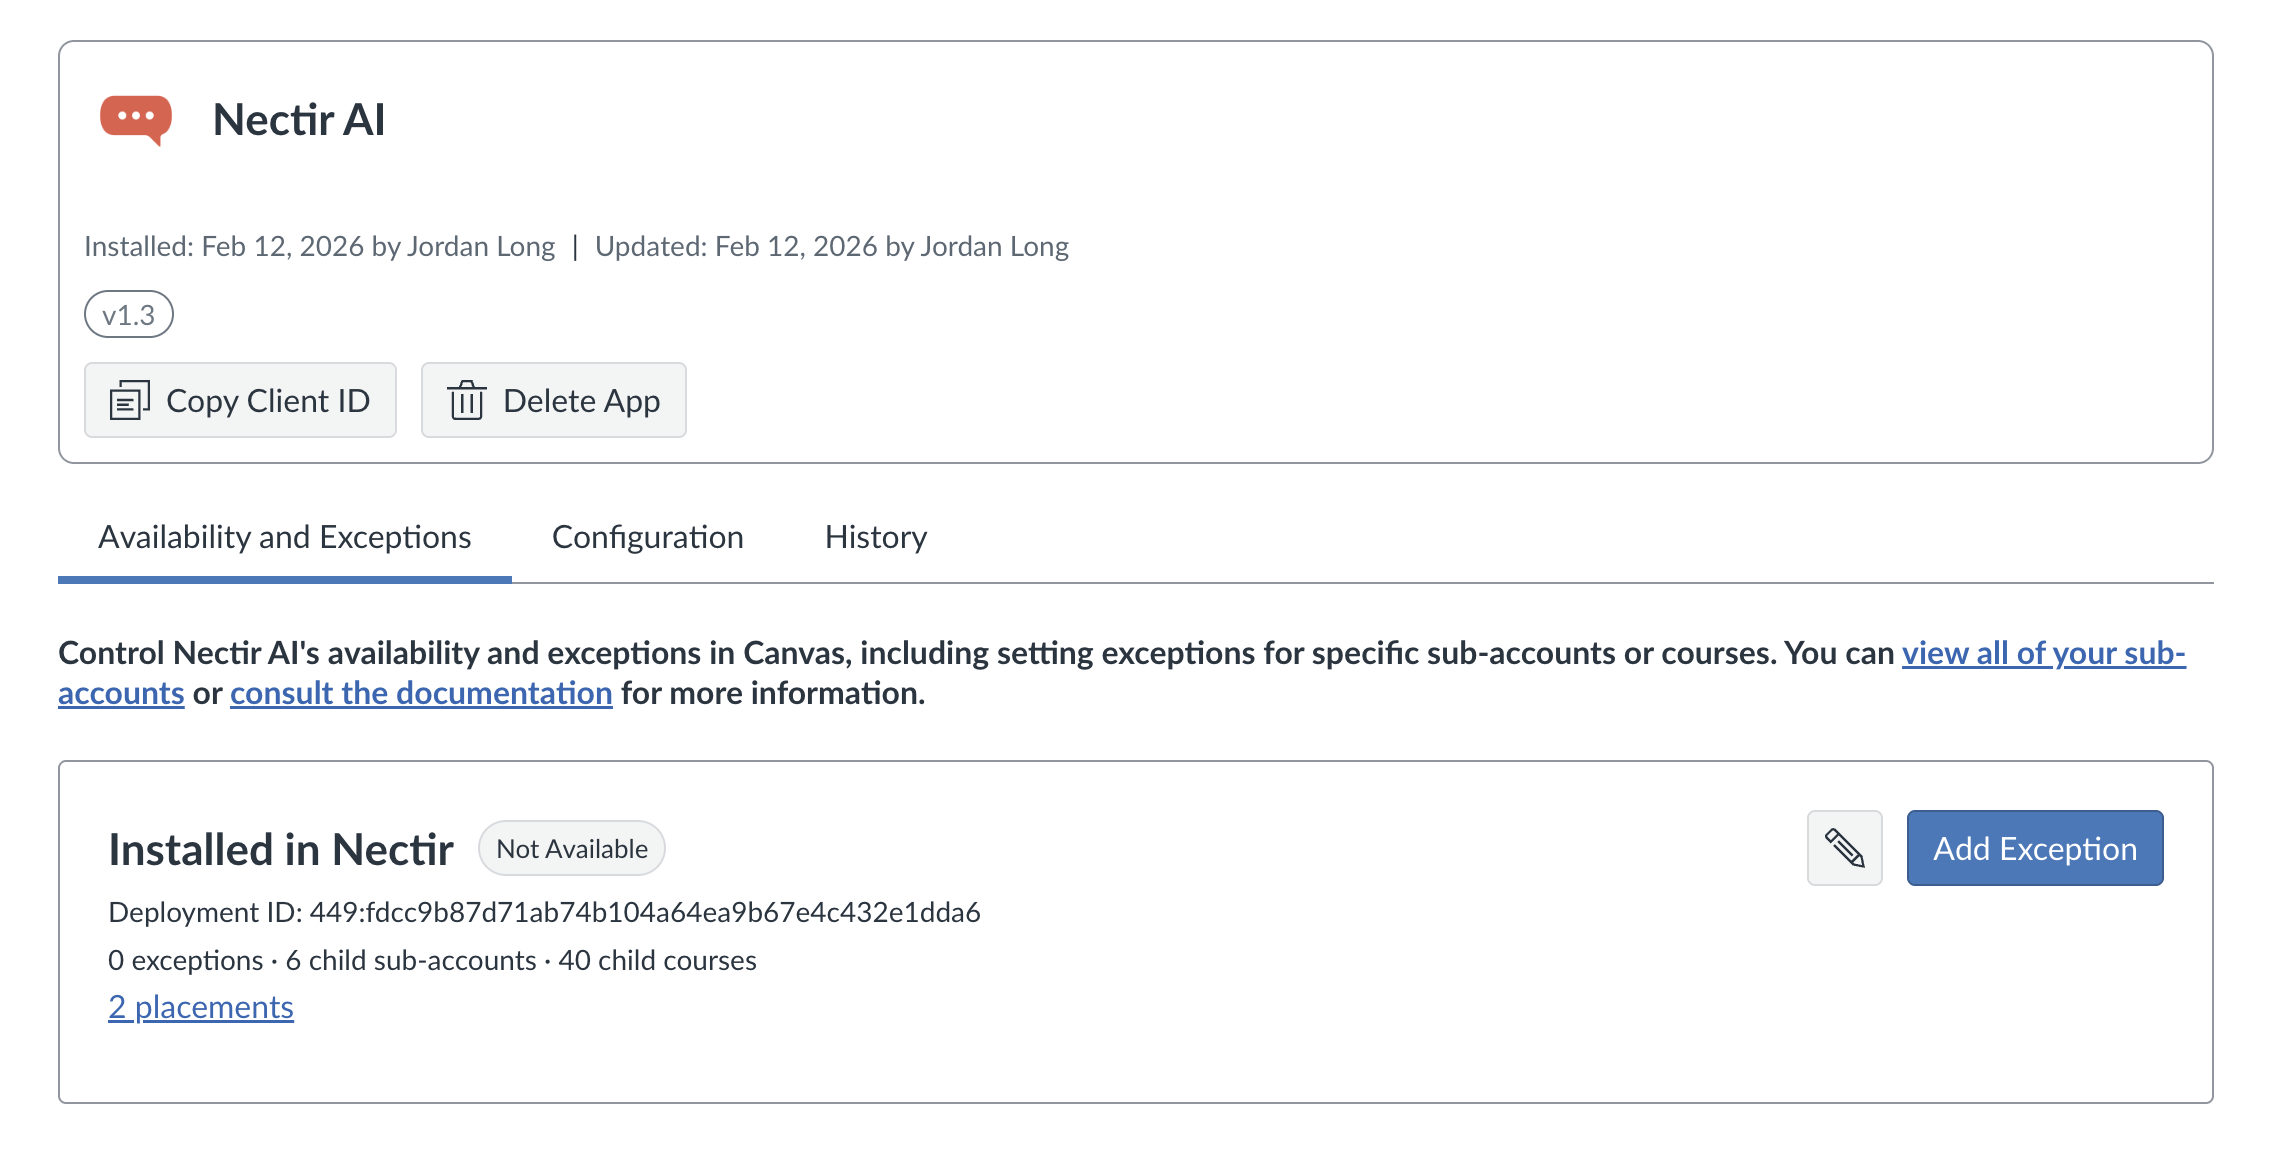
1. After installation, you'll see the Nectir AI app page in Canvas
2. Go to the **Availability and Exceptions** tab
3. Click the pencil icon to edit the root account
4. Change from **Not Available** to **Available**
### Enable the App in Canvas
1. After installation, you'll see the Nectir AI app page in Canvas
2. Go to the **Availability and Exceptions** tab
3. Click the pencil icon to edit the root account
4. Change from **Not Available** to **Available**
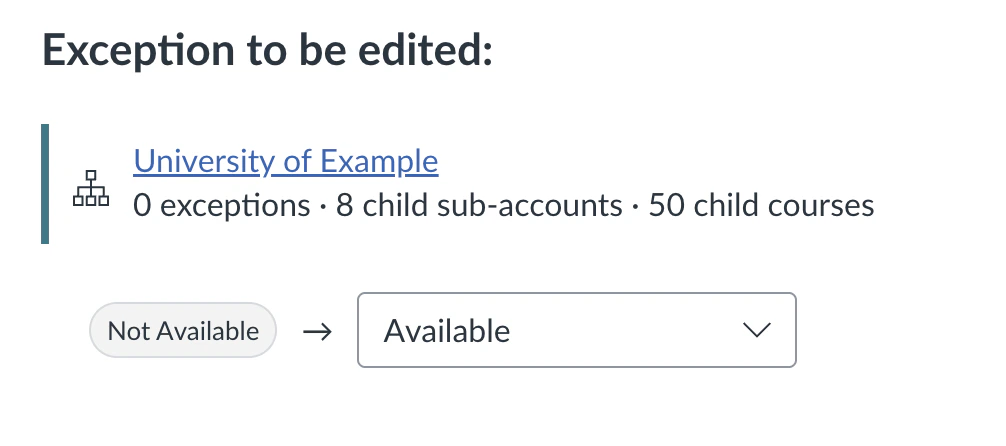 5. **Save**
6. Copy the **Client ID** from the app details
### Complete the Connection in Nectir AI
1. In Nectir AI, navigate to **Workspace settings** > **LMS integration** > **Add integration** > **Canvas** > **LTI integration**
2. Paste the Client ID
3. Enter your Canvas URL (for example, `https://yourinstitution.instructure.com`)
4. Select **Save and continue**
5. Select **Finish setup**
### Test the Integration
Open a Canvas course where your user **has an enrollment** (ideally as a Teacher) and select **Nectir AI** from the course navigation. Nectir AI should open a page where you can link or create a Nectir Group for that course, as described in [Add Nectir to a Canvas Course](/getting-started/canvas-embed-assistants#with-the-canvas-lti-integration).
If something isn't working:
* **Getting an error or not seeing Nectir AI?** Make sure you completed every step in [Complete the Connection in Nectir AI](#complete-the-connection-in-nectir-ai), including **Save and continue** and **Finish setup**. Without this, the integration won't work.
* **Landed on a generic Assistant instead of a course Group?** This often happens when an admin tests from a course they aren't enrolled in. Canvas sends course roles to Nectir AI, and without an enrollment, Nectir can't match you to the right Group. Test from a course where your user has an actual role.
* **Something else?** Contact [support@nectir.io](mailto:support@nectir.io).
### Instructor Setup Guide
After completing the LTI integration setup, point instructors to [Add Nectir to a Canvas Course](/getting-started/canvas-embed-assistants). It covers the four ways to add Nectir to a course (course sidebar, page, assignment, or module), plus [roster sync](/user-management/roster-sync) and managing courses across terms.
## District Sub-Account Setup
This section is for district Canvas administrators who manage a single Canvas instance with sub-accounts for multiple colleges.
Each college in your district needs its own Nectir Workspace and its own Canvas LTI app. This ensures students only access their college's Workspace. If you have five colleges, you'll need five Nectir Workspaces and five LTI apps.
### Choose Your Setup Approach
**How should students access Nectir AI?**
Each college gets its own Workspace and LTI app. Students only see their college's Nectir Workspace. Use this for most districts.
All colleges share a single Workspace and LTI app. Only use this for district-wide Canvas courses that enroll students from all colleges.
### Per-College Setup
Repeat the following steps for each college in your district.
Complete the [setup steps above](#canvas-lti-setup) using that college's Nectir Workspace. The process is identical to a standard installation: the configuration JSON you copy from Nectir AI already carries that Workspace's ID.
Use the **Nickname** field during installation to label each app (for example, `Nectir AI - West College`). This makes it easy to tell them apart in the Canvas Apps page.
After installing and connecting the app, restrict it so it only appears within the correct college's sub-account:
1. In Canvas, go to **Admin** > **Apps** > **Manage**
2. Select the Nectir AI app you just installed
3. Go to **Availability and Exceptions**
4. Ensure the root account is set to **Not Available**. If it shows as **Available**, select the pencil icon to edit it and change the visibility to **Not Available**
5. **Save**
6. Copy the **Client ID** from the app details
### Complete the Connection in Nectir AI
1. In Nectir AI, navigate to **Workspace settings** > **LMS integration** > **Add integration** > **Canvas** > **LTI integration**
2. Paste the Client ID
3. Enter your Canvas URL (for example, `https://yourinstitution.instructure.com`)
4. Select **Save and continue**
5. Select **Finish setup**
### Test the Integration
Open a Canvas course where your user **has an enrollment** (ideally as a Teacher) and select **Nectir AI** from the course navigation. Nectir AI should open a page where you can link or create a Nectir Group for that course, as described in [Add Nectir to a Canvas Course](/getting-started/canvas-embed-assistants#with-the-canvas-lti-integration).
If something isn't working:
* **Getting an error or not seeing Nectir AI?** Make sure you completed every step in [Complete the Connection in Nectir AI](#complete-the-connection-in-nectir-ai), including **Save and continue** and **Finish setup**. Without this, the integration won't work.
* **Landed on a generic Assistant instead of a course Group?** This often happens when an admin tests from a course they aren't enrolled in. Canvas sends course roles to Nectir AI, and without an enrollment, Nectir can't match you to the right Group. Test from a course where your user has an actual role.
* **Something else?** Contact [support@nectir.io](mailto:support@nectir.io).
### Instructor Setup Guide
After completing the LTI integration setup, point instructors to [Add Nectir to a Canvas Course](/getting-started/canvas-embed-assistants). It covers the four ways to add Nectir to a course (course sidebar, page, assignment, or module), plus [roster sync](/user-management/roster-sync) and managing courses across terms.
## District Sub-Account Setup
This section is for district Canvas administrators who manage a single Canvas instance with sub-accounts for multiple colleges.
Each college in your district needs its own Nectir Workspace and its own Canvas LTI app. This ensures students only access their college's Workspace. If you have five colleges, you'll need five Nectir Workspaces and five LTI apps.
### Choose Your Setup Approach
**How should students access Nectir AI?**
Each college gets its own Workspace and LTI app. Students only see their college's Nectir Workspace. Use this for most districts.
All colleges share a single Workspace and LTI app. Only use this for district-wide Canvas courses that enroll students from all colleges.
### Per-College Setup
Repeat the following steps for each college in your district.
Complete the [setup steps above](#canvas-lti-setup) using that college's Nectir Workspace. The process is identical to a standard installation: the configuration JSON you copy from Nectir AI already carries that Workspace's ID.
Use the **Nickname** field during installation to label each app (for example, `Nectir AI - West College`). This makes it easy to tell them apart in the Canvas Apps page.
After installing and connecting the app, restrict it so it only appears within the correct college's sub-account:
1. In Canvas, go to **Admin** > **Apps** > **Manage**
2. Select the Nectir AI app you just installed
3. Go to **Availability and Exceptions**
4. Ensure the root account is set to **Not Available**. If it shows as **Available**, select the pencil icon to edit it and change the visibility to **Not Available**
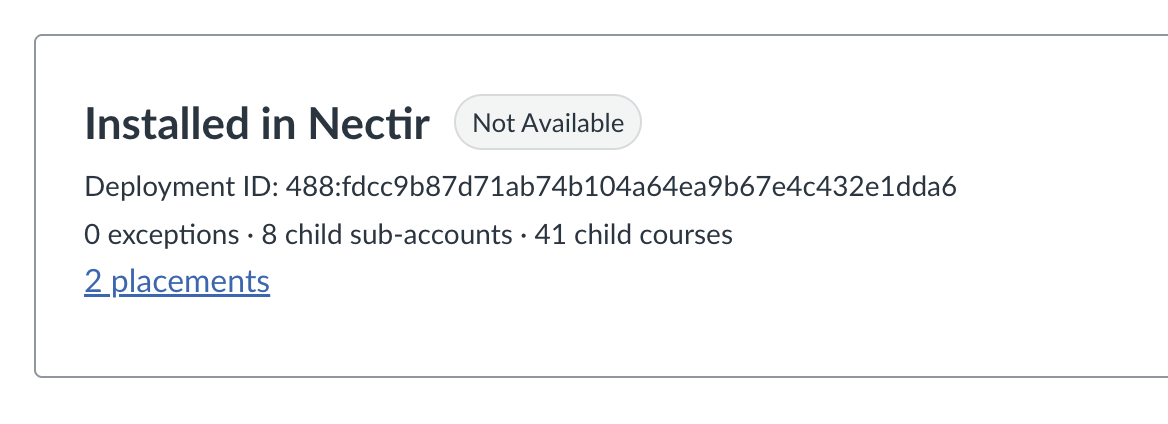 5. Select **Add Exception**
6. Choose the sub-account for this college and set it to **Available**
5. Select **Add Exception**
6. Choose the sub-account for this college and set it to **Available**
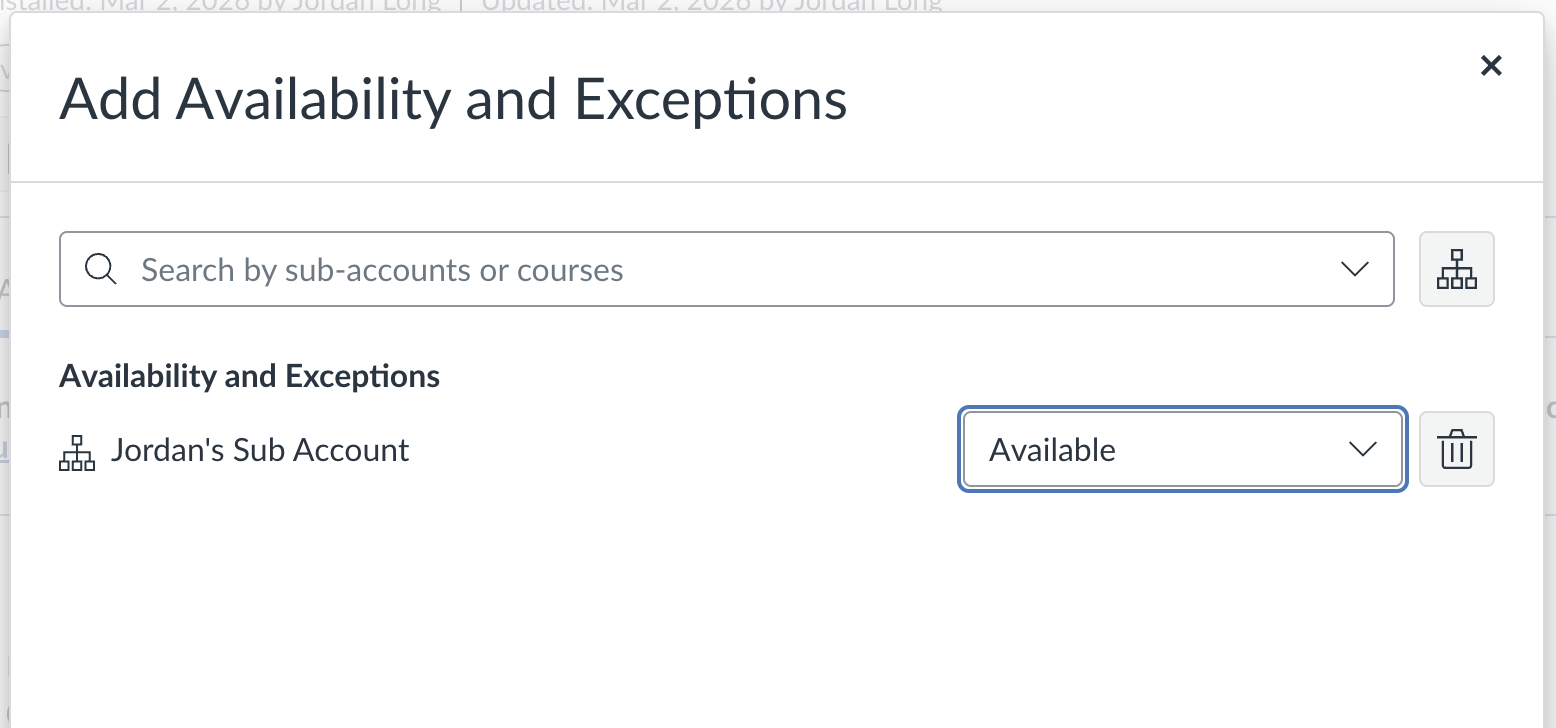 7. Select **Save**
Access a course within the college's sub-account and confirm that Nectir AI appears and connects to the correct Workspace.
Repeat steps 1–3 for each remaining college in your district.
### District-Wide Setup
If your district runs Canvas courses that enroll students from all colleges and you want a single shared Workspace, follow the [setup steps in Canvas LTI Setup](#canvas-lti-setup) once at the district root level and enable the app for the root account. You don't need sub-account scoping.
Use a dedicated district-level Nectir Workspace for this setup — do not reuse a Nectir Workspace that belongs to a specific college. Installing at the district root means students from all colleges will be added to that Workspace. If you need help creating or adjusting your Workspaces, contact [support@nectir.io](mailto:support@nectir.io).
## Troubleshooting
If you're experiencing issues with your Canvas integration:
**For Canvas-specific problems:** go to [Canvas Integration Issues](/troubleshooting/canvas-issues) for help with:
* Assistant doesn't appear in Canvas course
* Login prompts when accessing through Canvas
* Connection confirmation issues
* Course linking problems
**For general browser problems:** go to [Browser & Display Issues](/troubleshooting/troubleshooting) for help with:
* Pages not loading correctly
* Broken layouts or missing buttons
* Cache and cookie issues
* Browser compatibility problems
**For other issues:** contact support at [support@nectir.io](mailto:support@nectir.io)
7. Select **Save**
Access a course within the college's sub-account and confirm that Nectir AI appears and connects to the correct Workspace.
Repeat steps 1–3 for each remaining college in your district.
### District-Wide Setup
If your district runs Canvas courses that enroll students from all colleges and you want a single shared Workspace, follow the [setup steps in Canvas LTI Setup](#canvas-lti-setup) once at the district root level and enable the app for the root account. You don't need sub-account scoping.
Use a dedicated district-level Nectir Workspace for this setup — do not reuse a Nectir Workspace that belongs to a specific college. Installing at the district root means students from all colleges will be added to that Workspace. If you need help creating or adjusting your Workspaces, contact [support@nectir.io](mailto:support@nectir.io).
## Troubleshooting
If you're experiencing issues with your Canvas integration:
**For Canvas-specific problems:** go to [Canvas Integration Issues](/troubleshooting/canvas-issues) for help with:
* Assistant doesn't appear in Canvas course
* Login prompts when accessing through Canvas
* Connection confirmation issues
* Course linking problems
**For general browser problems:** go to [Browser & Display Issues](/troubleshooting/troubleshooting) for help with:
* Pages not loading correctly
* Broken layouts or missing buttons
* Cache and cookie issues
* Browser compatibility problems
**For other issues:** contact support at [support@nectir.io](mailto:support@nectir.io)