You can access Nectir AI through two primary methods: directly from the website or through your Learning Management System (LMS). The method you’ll use depends on how your institution has set up Nectir AI.
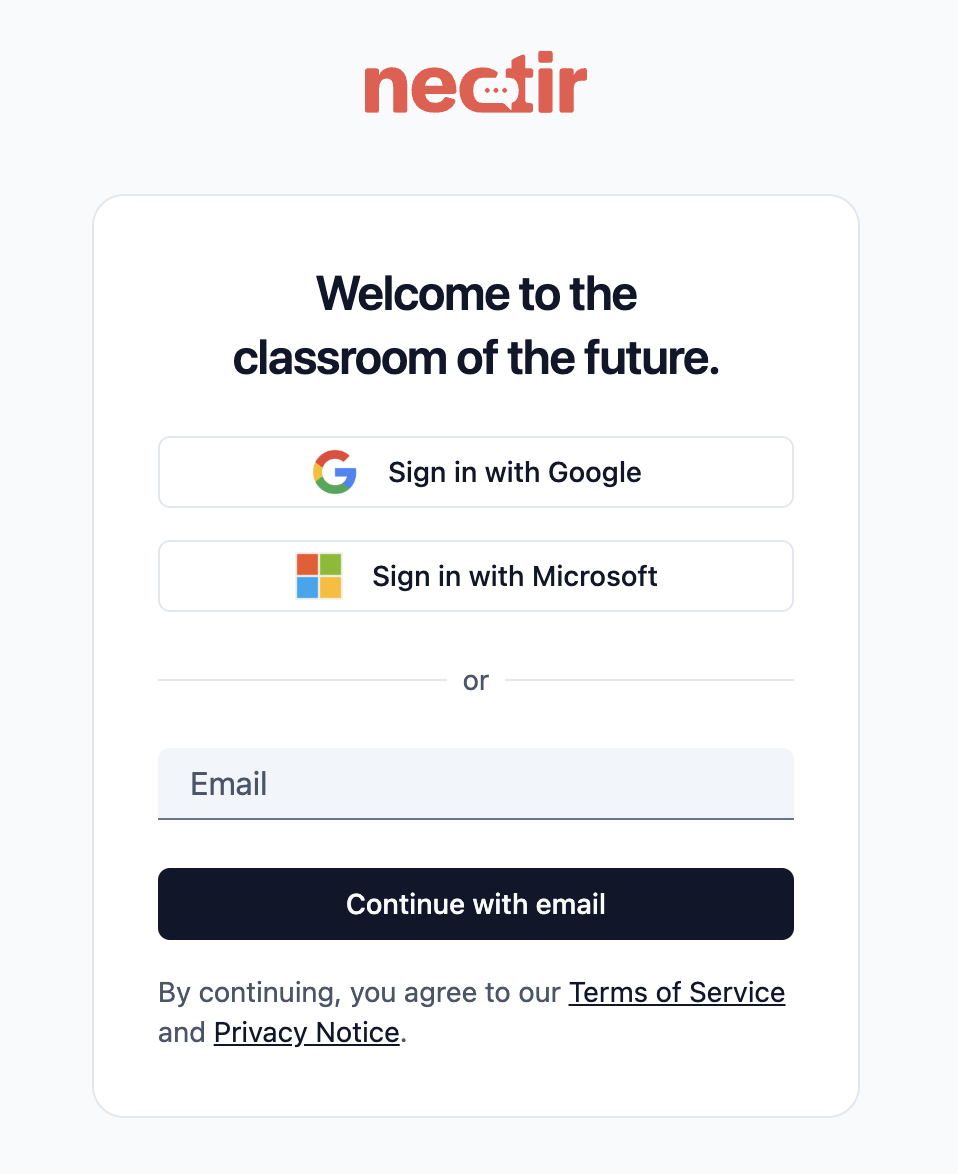
Sign in with your email - Nectir AI doesn’t have accounts or passwords, so use either the email that received an invitation or an email you want to use for school toolsSelect the appropriate sign-in method based on your email type:
Gmail Users
Click “Sign in with Google” and sign in with your Gmail account
Outlook Users
Click “Sign in with Microsoft” and sign in with your Outlook account
Other Email Providers
Click “Continue with Email” and follow the email verification process
Join an existing workspace (if invited)
Start using Nectir AI
Requirements: Email invitation or invitation link
General Steps:
Log in to your LMS (Canvas, D2L, Moodle, etc.)
Navigate to the course with Nectir AI
Click the “Nectir AI” button
Accept cookies (first time only)
Start using Nectir AI immediately
Requirements: Access to course/shell where Nectir AI is available
When accessing Nectir AI through the website at ai.nectir.io, you have two pathways:
Email Invitation
Direct invite to your emailEducator adds your email to a Workspace or Group
Invitation Link
Shareable link accessJoin using a link shared by your educator
If you want to test Nectir AI for the first time and know that no one has paid for it yet, you can refer to this link: https://ai.nectir.io/trial/signin
Website Access: Email Invitation
This method is used when your educator manually invites you by adding your email to the workspace or Group.
1
Check Your Email
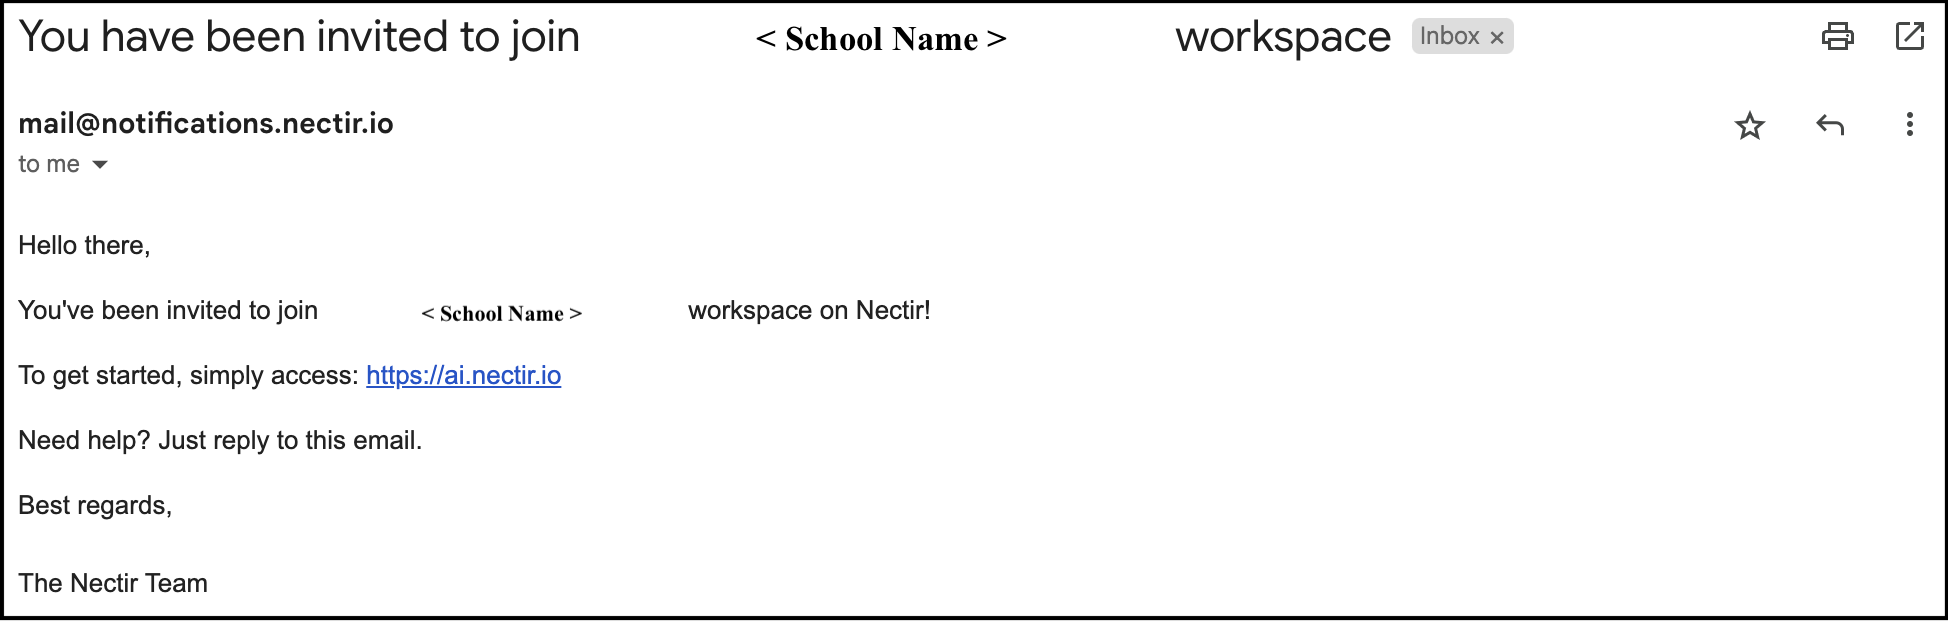
Look for an invitation email from Nectir AI in your inbox.
Select the appropriate sign-in method based on your email type:
Gmail Users
Click “Sign in with Google” and sign in with your Gmail account
Outlook Users
Click “Sign in with Microsoft” and sign in with your Outlook account
Other Email Providers
Click “Continue with Email” and follow the email verification process
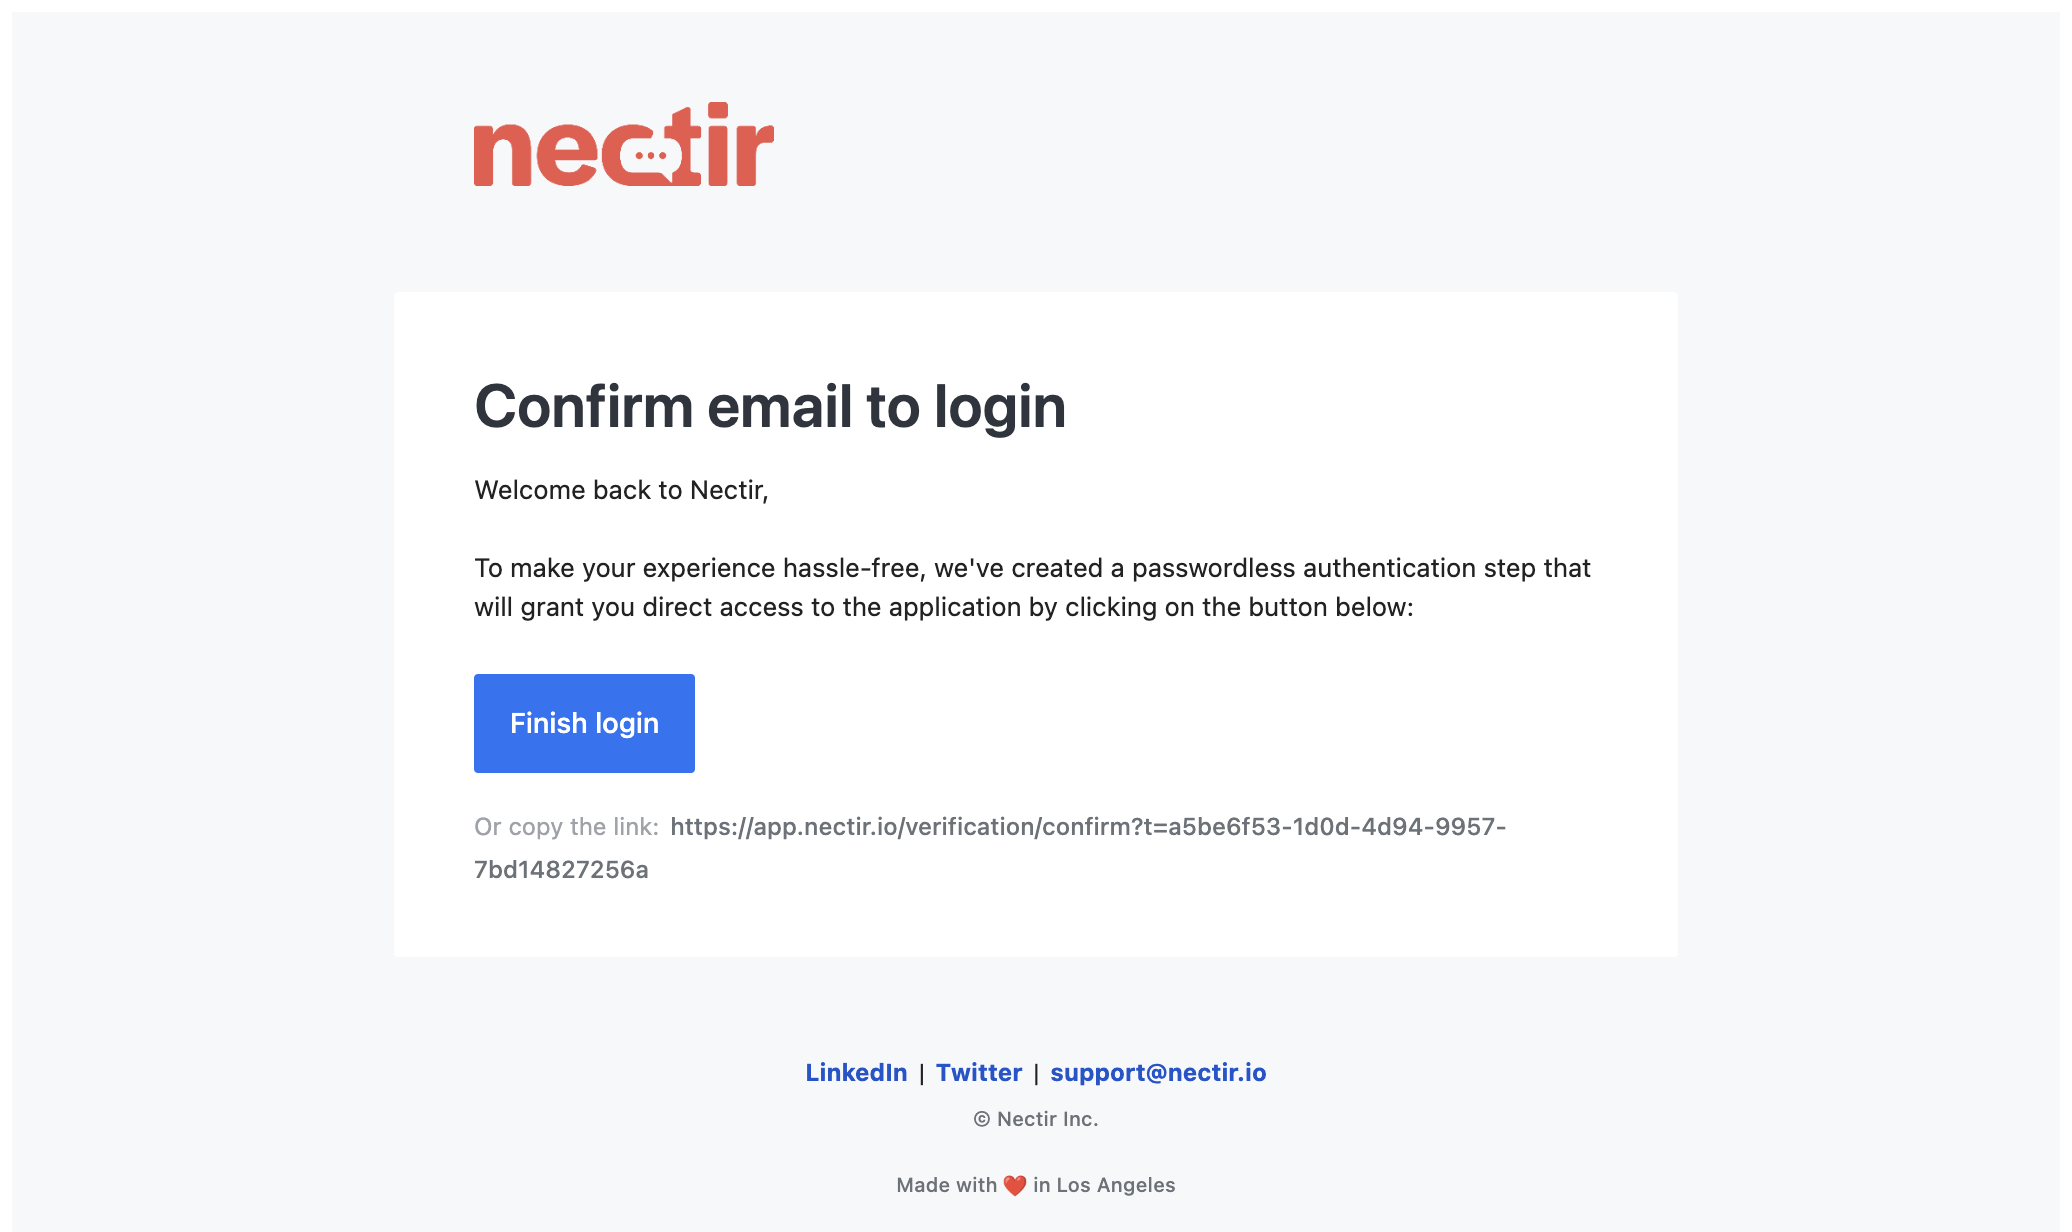
If using “Continue with Email”, you’ll receive a verification email:
Email verification message
You must use the same email address that received the invitation
No password is required to access Nectir AI
If you receive an error message when using Google or Microsoft login, try the “Continue with Email” option instead
4
Join the Workspace
After signing in, click the “Join” button to access your workspace
Accepting a workspace invitation
Targeted invitations to specific individuals
Easy tracking of who has been invited
Simple acceptance process through email
Website Access: Invitation Link
This method is used when your educator shares a special invitation link that allows you to join the workspace.
1
Click the Invitation Link
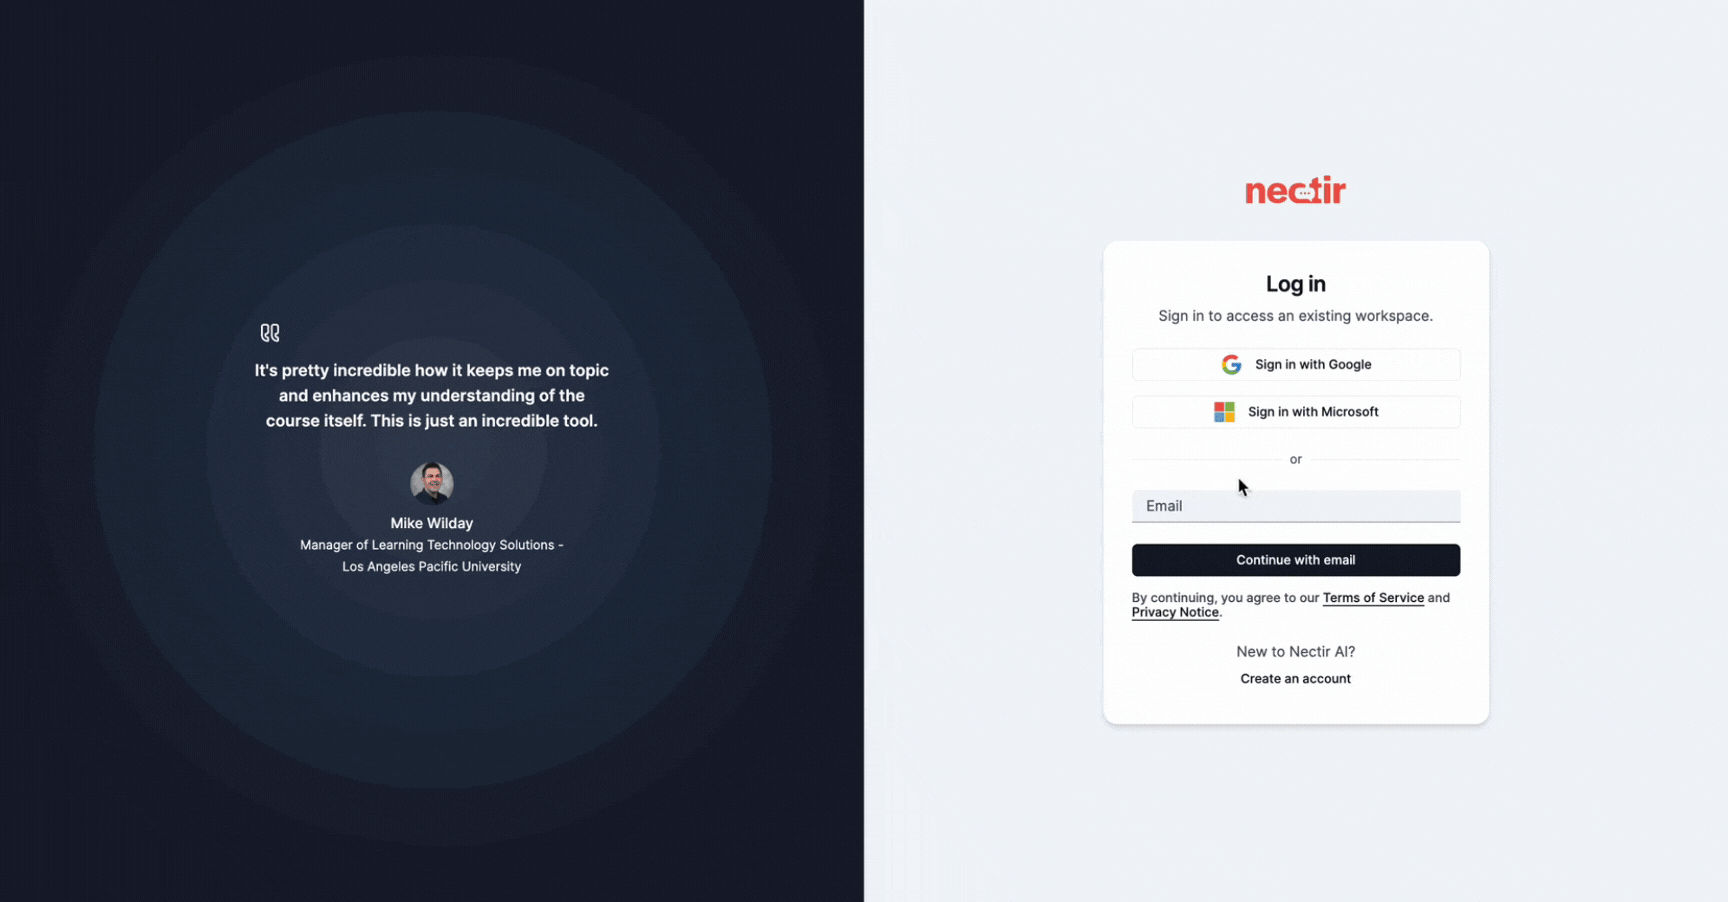
Your educator will provide you with a unique link to join the workspaceThe link will typically start with: https://ai.nectir.io/invite?…After clicking the link, you’ll be directed to the Nectir AI login screen:
Nectir AI login screen
2
Sign In with Your Email
Select the appropriate sign-in method based on your email type:
Gmail Users
Click “Sign in with Google” and sign in with your Gmail account
Outlook Users
Click “Sign in with Microsoft” and sign in with your Outlook account
Other Email Providers
Click “Continue with Email” and follow the email verification process
If using “Continue with Email”, you’ll receive a verification email:
Email verification message
No password is required to access Nectir AI
If you receive an error message when using Google or Microsoft login, try the “Continue with Email” option instead
3
Join the Workspace
After authentication, you’ll be automatically directed to join the workspace
No need to wait for individual email invitations
Same link can be shared with many users
Easy to distribute through course materials or announcements
LMS Integration Access
This is the simplest access method. No invitation is required - you just need access to the course or shell where Nectir AI has been made available. The LMS button serves as your invitation and completely bypasses the need for separate authentication.
1
Log in to Your Learning Management System
Access your institution’s LMS (Canvas, D2L, Moodle, etc.) with your credentials
2
Navigate to Your Course
Select the course that has Nectir AI integration
3
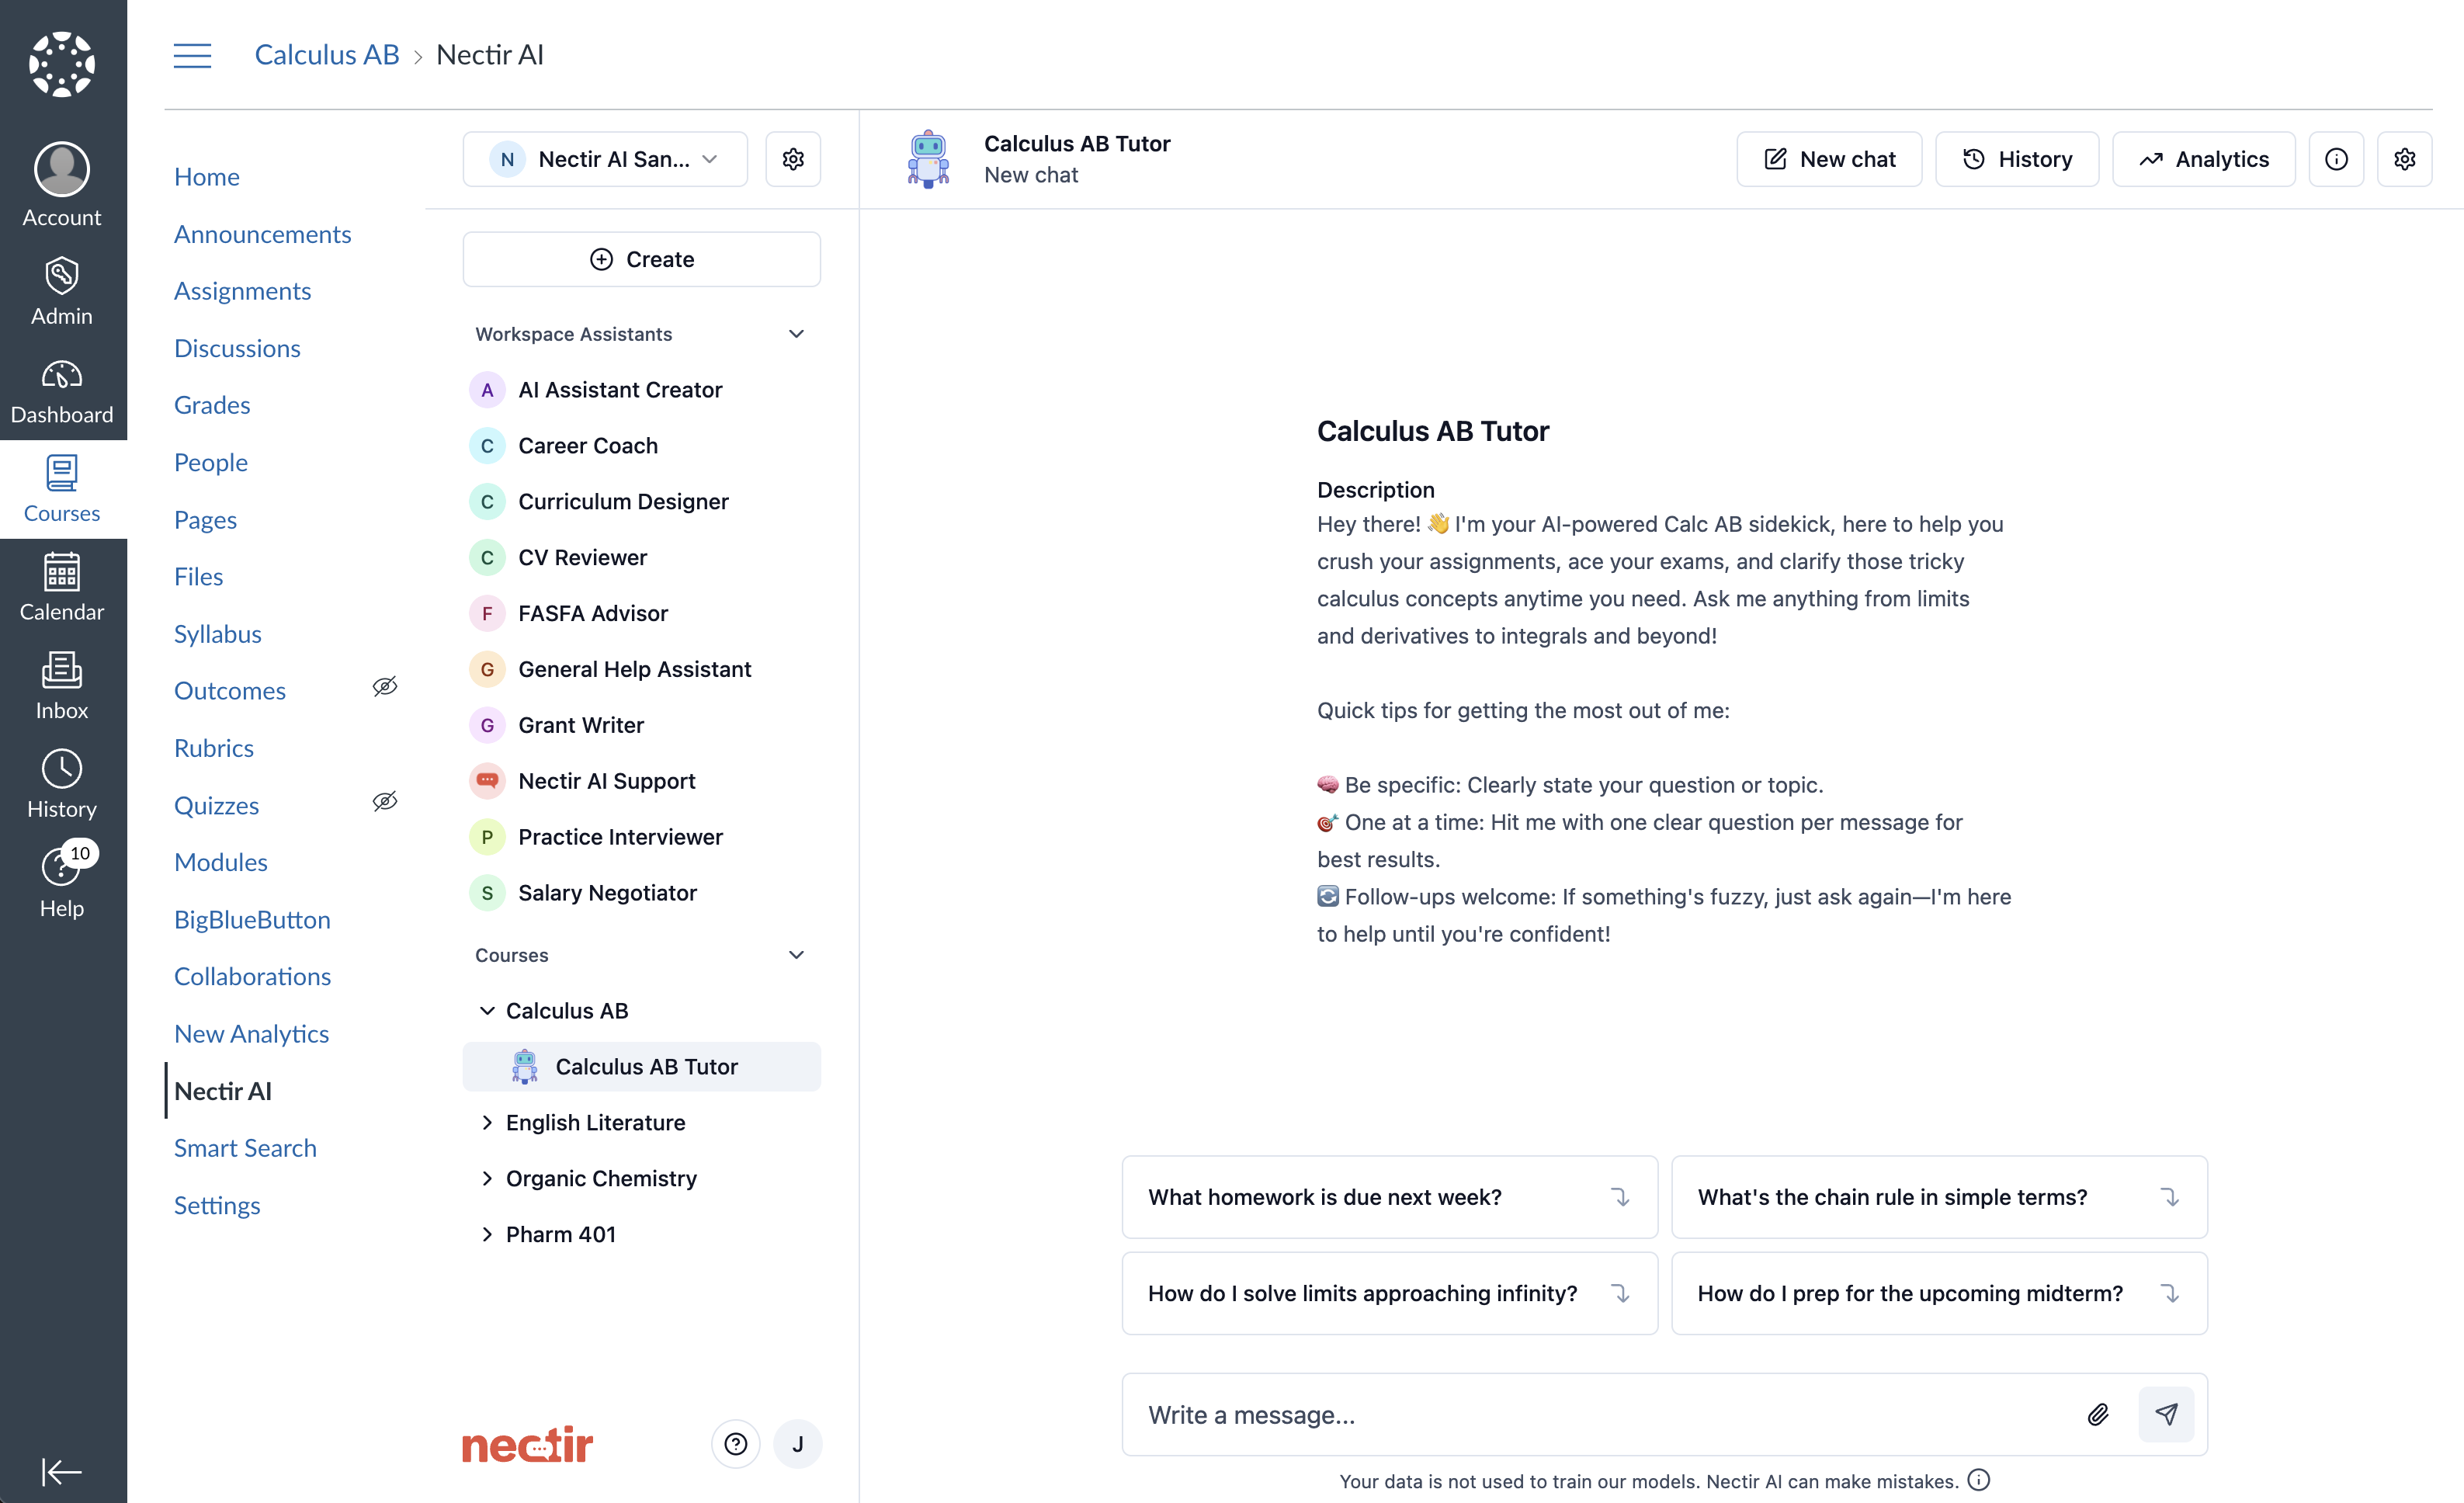
Click on Nectir AI
Click on the “Nectir AI” button or link in your course
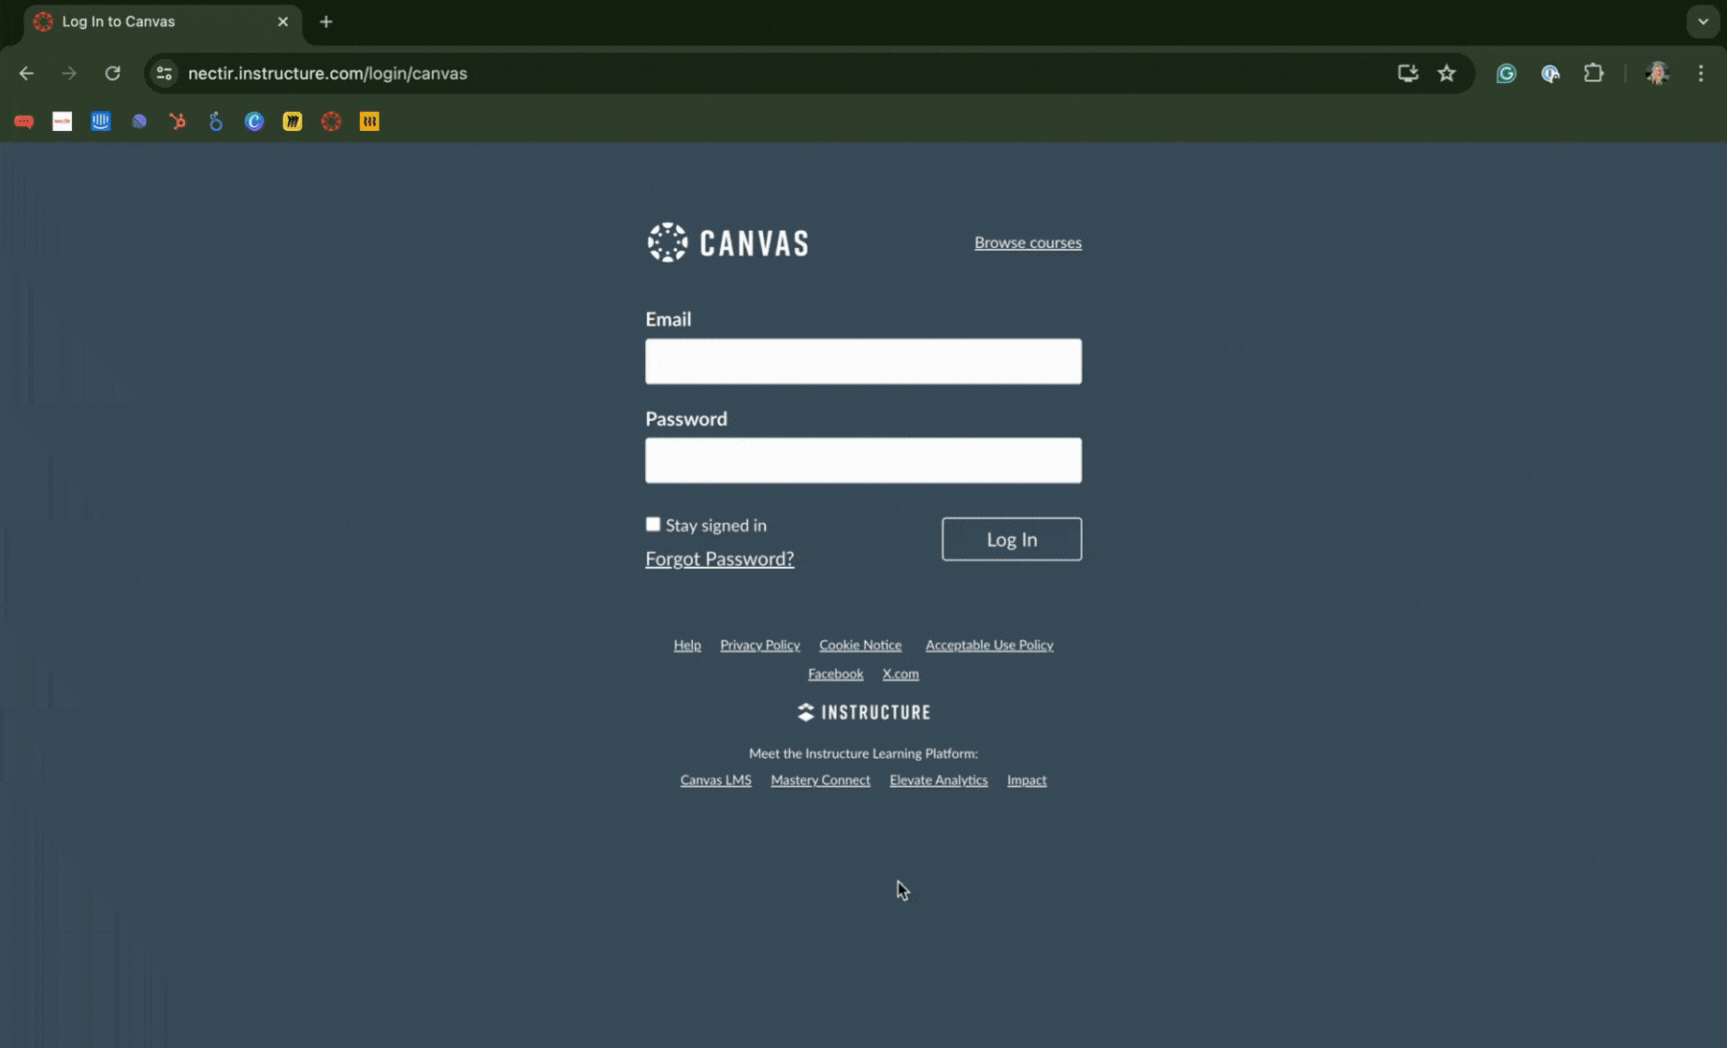
Accessing Nectir AI through Canvas LMS
4
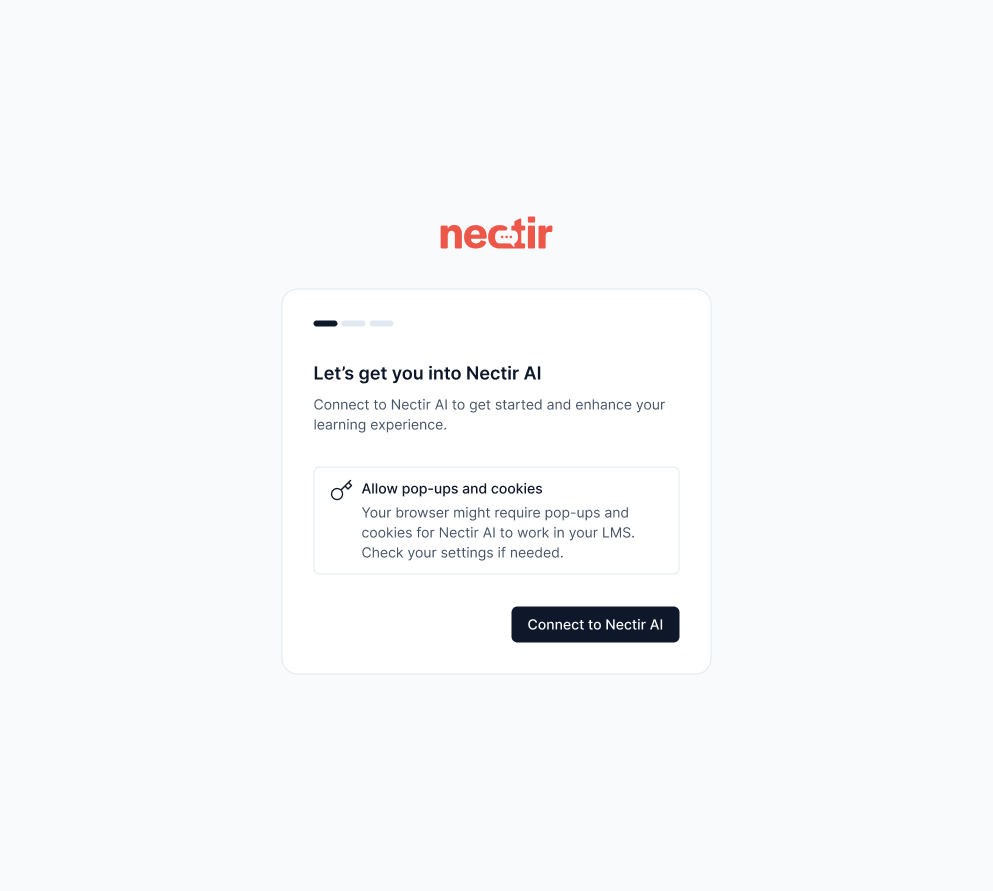
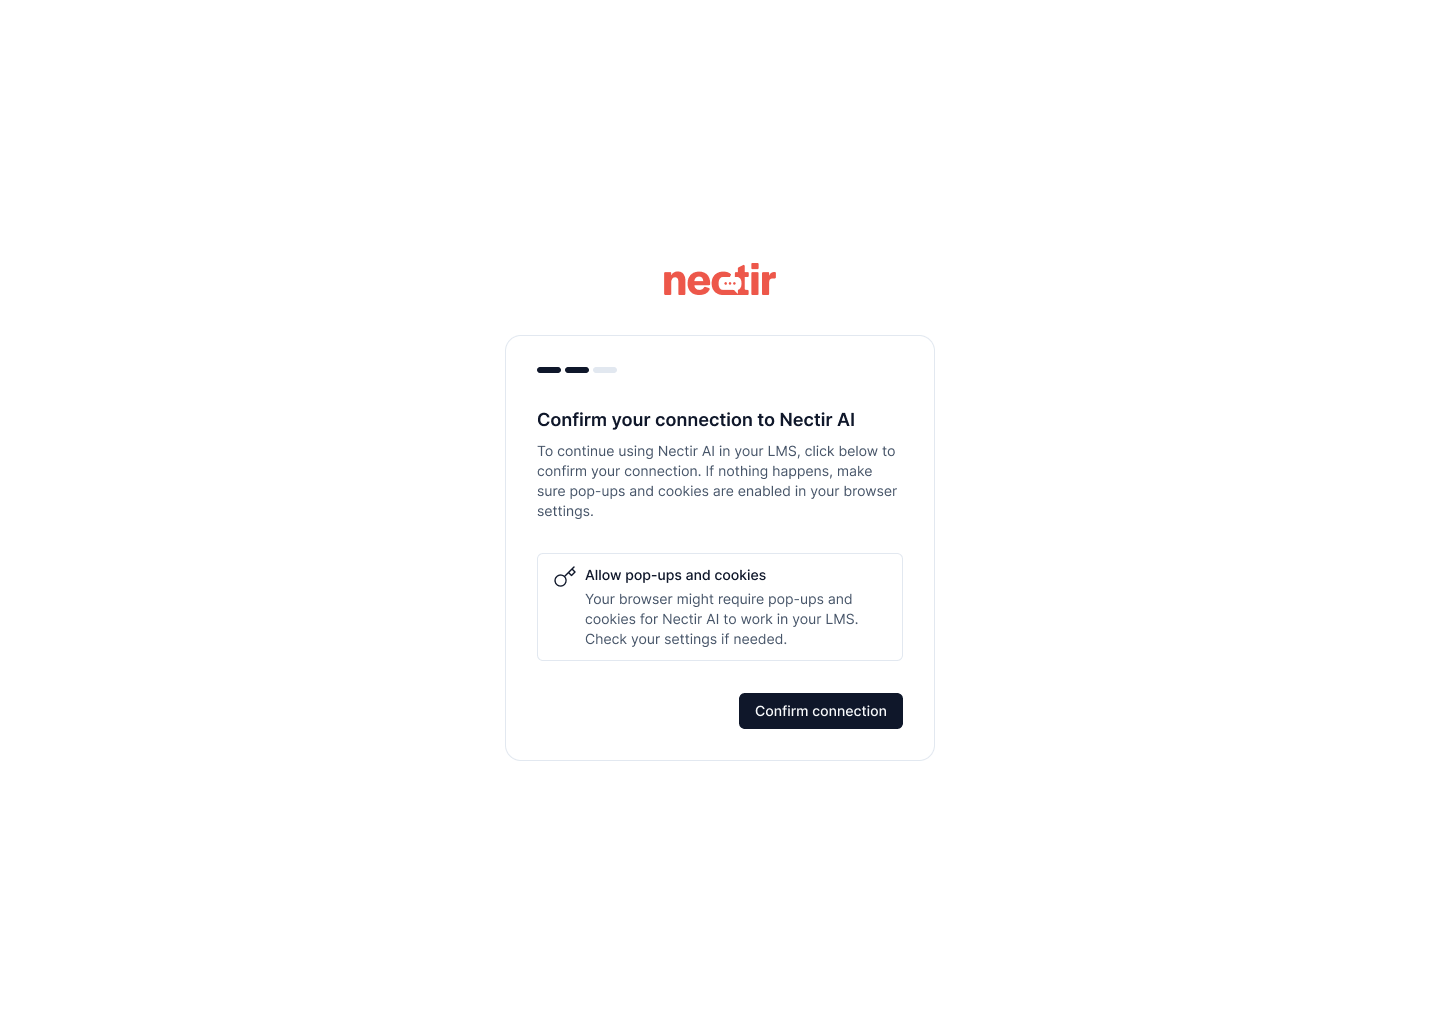
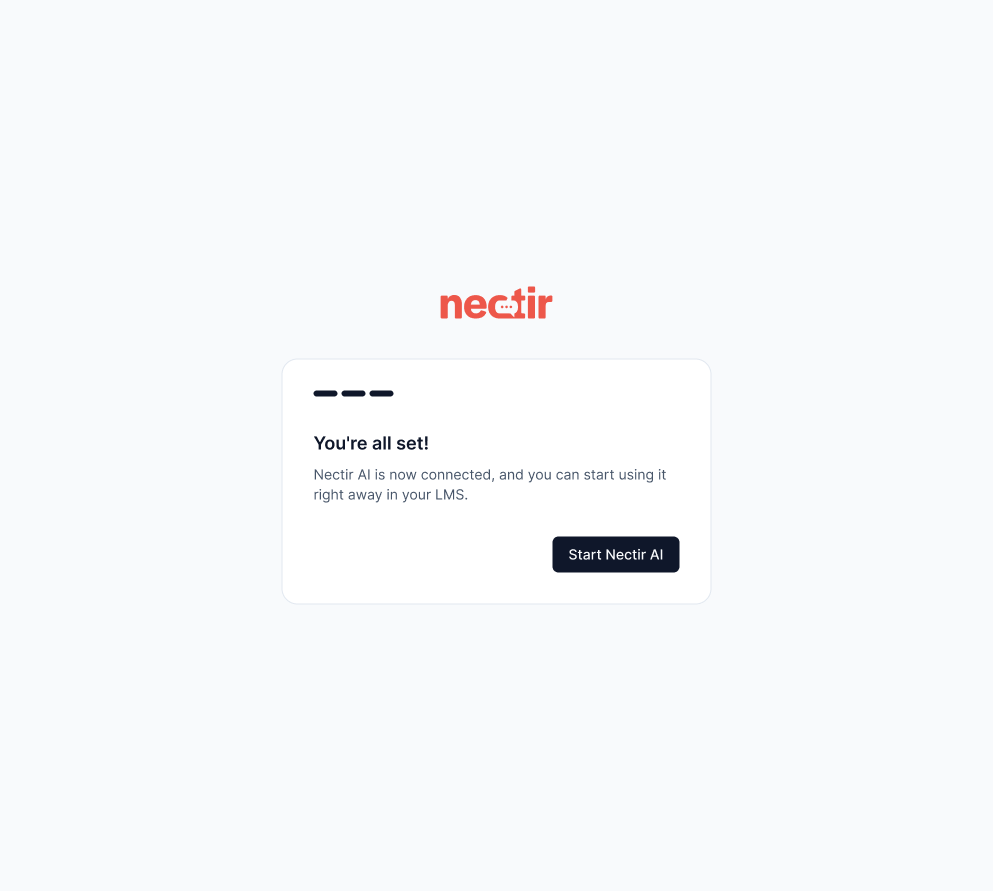
Accept Cookies
When accessing Nectir AI for the first time, you’ll need to accept cookies:
Click 'Manage cookies'
Toggle all cookie options to 'On'
Click 'Accept all cookies'
5
Your Account is Automatically Provisioned
A Nectir AI account will be automatically created for you the first time you click the button - no separate login or invitation neededOn subsequent visits, you’ll be taken directly to your workspace through LMS authentication