If your Workspace was created by the Nectir team, you can jump directly to managing the settings below. For new Workspaces, contact support@nectir.io for setup assistance.
Access Workspace Settings
To access your Workspace settings, click the settings icon in the top left corner of your Nectir AI workspace.General Settings
In the General Settings tab, you can configure basic Workspace information:Workspace Avatar
Click on the current avatar to upload a new image that represents your organization or institution
Workspace Name
Update the Workspace name to reflect your organization’s branding or preferred identifier
Workspace ID
Use the Copy button next to the Workspace ID field to get your unique identifier for LTI integration setup
Members
The Members tab allows Workspace Owners to manually invite educators to the Workspace:- Invite New Members: Click Invite Members and enter email addresses or use a shared invitation link - this works the same as inviting users into Groups
- Assign Roles: Select appropriate roles for each invited member
- Bulk Actions: Multi-select members to perform bulk actions like removing users or changing roles for many members at once
Owner
Full administrative access including Workspace settings, member management, and all creation/editing permissions
Editor
Can create and manage Groups and Assistants, but cannot modify Workspace settings or manage members
Member
Read-only access to view content within Groups they’ve been added to
LTI Integration: If your Workspace uses LTI integration, member management is typically automated through your LMS. See LMS Role Mapping below to learn how user roles are automatically assigned.
LMS Integration
The LMS Integration tab contains settings for Workspaces that use Learning Management System integration.Initial Workspace Setup via LMS
If you’re setting up your Workspace for the first time through an LMS integration, refer to platform-specific setup guides:Canvas Setup
Learn how to set up your Workspace through Canvas LTI integration
LMS Role Mapping
Once you connect your Workspace to your LMS, you can configure how LMS roles map to Nectir roles. Workspace Owners can automatically map LMS roles to Nectir roles, streamlining the user management process: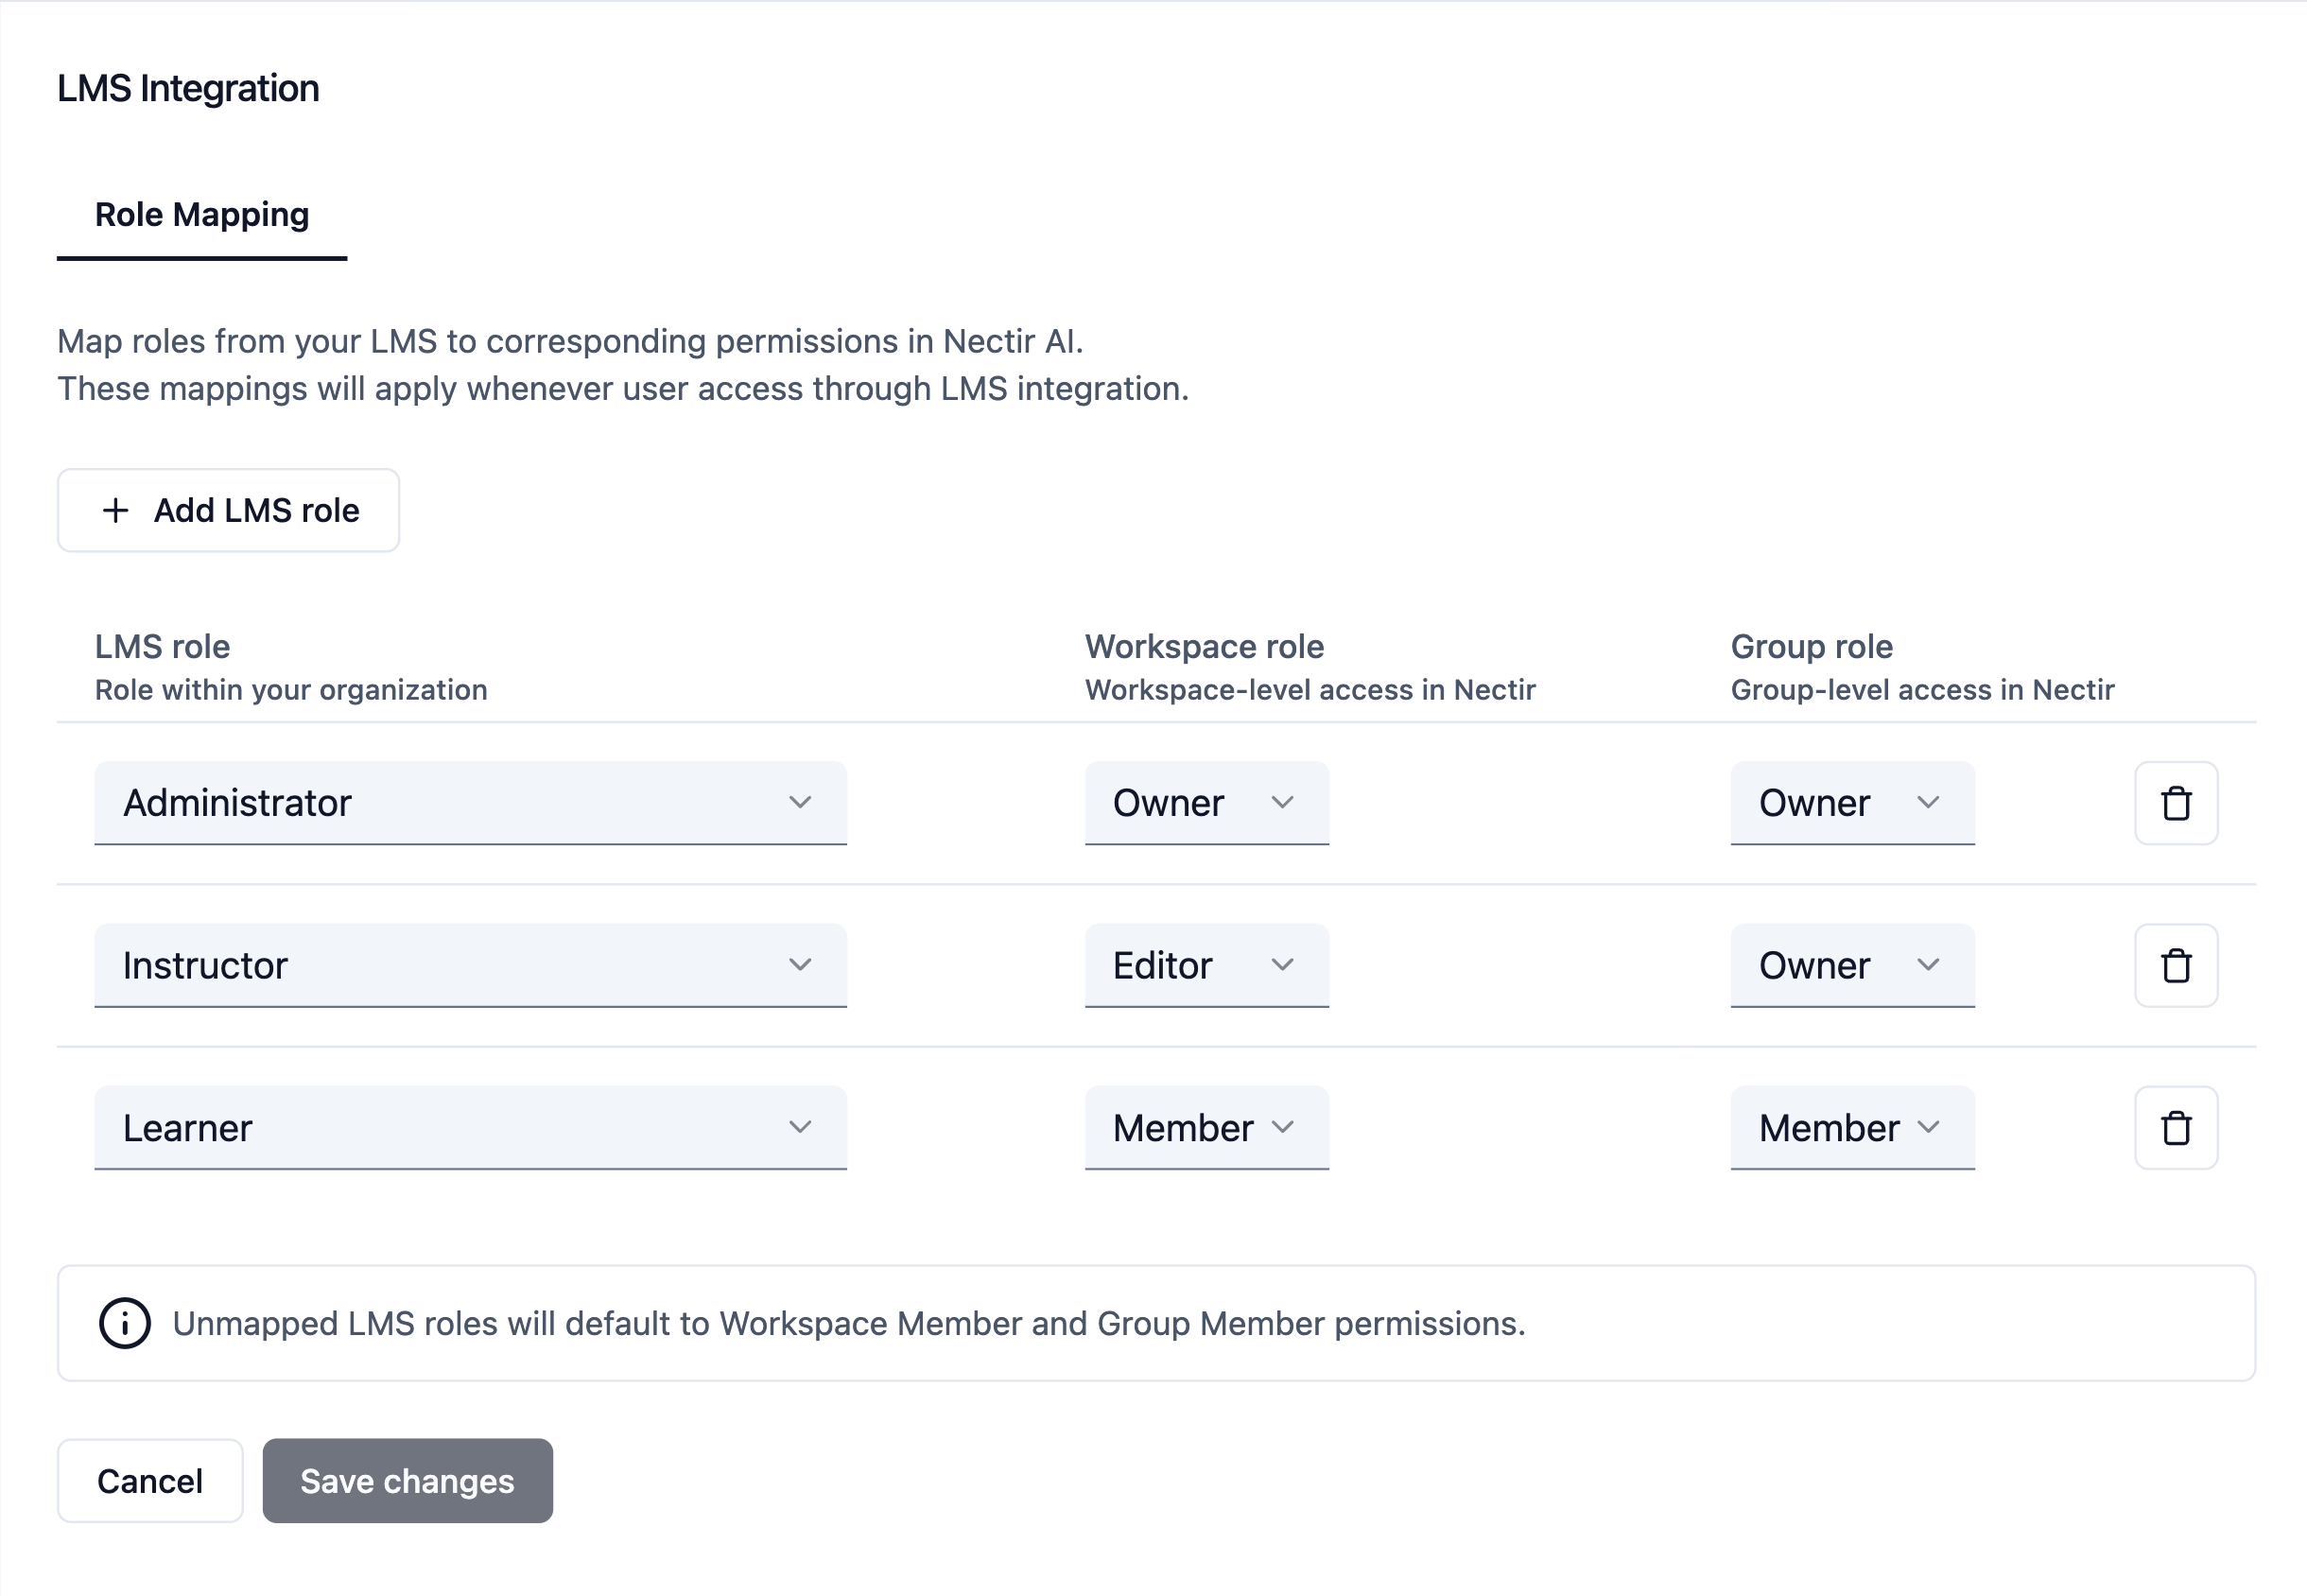
Understanding Role Mapping
LMS role mapping determines what permissions users receive in Nectir based on their role within a specific LMS course. Understanding how this works is critical for proper setup: Course-Specific Roles Nectir uses the role assigned to a user within each specific LMS course to determine their Group permissions. Since users may hold different roles across different courses (for example, a faculty member might be an instructor in some courses and a student in others), their Nectir permissions vary by Group based on their course-specific role. Unmapped Roles If a user has an LMS role that doesn’t map to any Nectir role, Nectir redirects them to the Workspace level without access to the specific Group. Make sure all relevant LMS roles map to appropriate Nectir roles. Admin Setup Requirements If an LMS administrator is setting up integrations on behalf of instructors, they must be an actual member of the LMS course (ideally with an instructor role) to receive appropriate permissions in Nectir to complete the setup. Having administrator privileges at the institution level isn’t enough without course membership.Recommended Role Mapping
- Workspace Owners: LMS administrators who need full control over the Workspace
- Workspace Editors: Faculty members who create and manage Assistants across their courses
Configuration Steps
1
Access LMS Integration Settings
Access your Workspace Settings by clicking on the settings icon on the top left, then click LMS Integration on the left sidebar.
2
Configure Role Mappings
On the LMS Integration page, set how each LMS role should map to Nectir roles:
- Administrator → Choose mapping for LMS administrators (typically Owner)
- Instructor → Choose mapping for LMS instructors (typically Editor)
- TA/Designer → Choose mapping for teaching Assistants and course designers
- Student → Choose mapping for students (typically Member)
3
Save Your Configuration
Click Save Changes to apply the role mapping configuration.
Benefits of LMS role mapping:
- Automatic user provisioning - Users are created with appropriate permissions when they access through the LMS
- Consistent permissions - Maintains alignment between LMS and Nectir roles
- Reduced manual management - Eliminates the need to individually assign roles to users
- Seamless experience - Users receive the right level of access without additional configuration