Understanding User Access Levels
Nectir AI has two levels of user access, each serving different organizational purposes:Workspace Access
Institution-wide access to your entire Nectir AI workspace. Users can see and access content based on their workspace role and Group memberships.
Group Access
Specific access to individual Groups (courses, projects, etc.). Users only see content within the Groups they’ve been invited to.
Three Ways to Provide Access
Choose the method that best fits your institution’s needs:1. Workspace-Level Invitations
1. Workspace-Level Invitations
Best for: Small institutions or selective accessWorkspace Owners manually invite users via email or invitation links. Users gain workspace-wide access and can then be added to specific Groups as needed.Workspace Roles and Permissions:
- Owner - Complete control over the Workspace
- Only Owners can create Groups and Assistants that are “Shared with everyone”
- Only Owners can modify all Shared Groups and Assistants
- Only Owners can view Private Groups and Assistants usage via Workspace Analytics, but cannnot modify
- Editor - Can create new and manage existing Groups and Assistants that they have been invited to
- Member - Can only interact the Groups and Assistants created for them
2. Group-Level Invitations
2. Group-Level Invitations
Best for: Course-specific access or project-based teamsGroup Owners invite users directly to specific Groups. Users only see and access content within those Groups.Group Roles and Permissions:
- Owner - Complete control over the Group and the Assistants
- Facilitator - View all view all the settings and analytics, but cannot modify
- Member - Can only interact with Assistants
3. LTI Integration (No Manual Invitations) - Recommended
3. LTI Integration (No Manual Invitations) - Recommended
Best for: Large institutions with existing LMS infrastructureUsers automatically gain access when they click through from your LMS (Canvas, Moodle, etc.). No manual invitations needed - access is granted seamlessly through your existing course structure.LMS Role Mapping:
LMS roles (Student, Instructor, TA) automatically map to Nectir workspace roles. Configure your role mappings in Workspace Settings.
Workspace-Level Invitations
Only Workspace Owners can invite users to the workspace.
- Email Invitation (Recommended)
- Invitation Link
1
Access Workspace Settings
Click on the on the top left.
2
Navigate to Members
Click Members on the left sidebar.
3
Start Invitation Process
Click Invite members on the top right.
4
Add Email Addresses
Copy and paste users’ school-provided emails (you can paste directly from your roster - emails will be automatically extracted).
5
Select Role
Select a role for all invitees (you can change this later):
- Owner - Complete control over the Workspace, can create Groups and Assistants shared with everyone, modify all Shared content, and view all analytics
- Editor - Can create and manage Groups and Assistants they have been invited to
- Member - Can only interact with Groups and Assistants created for them
6
Customize Email and Send
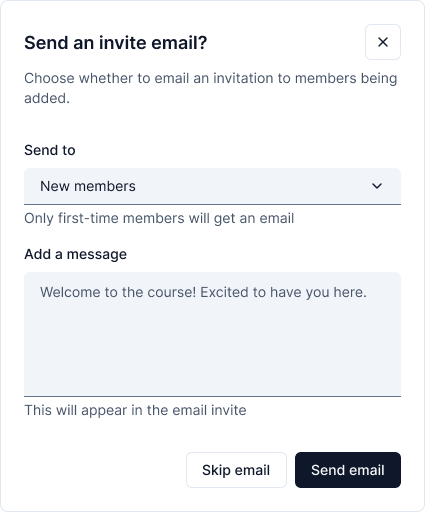
- Everyone - All email addresses in your list (including previously invited users)
- New people only - Only users who haven’t been invited before
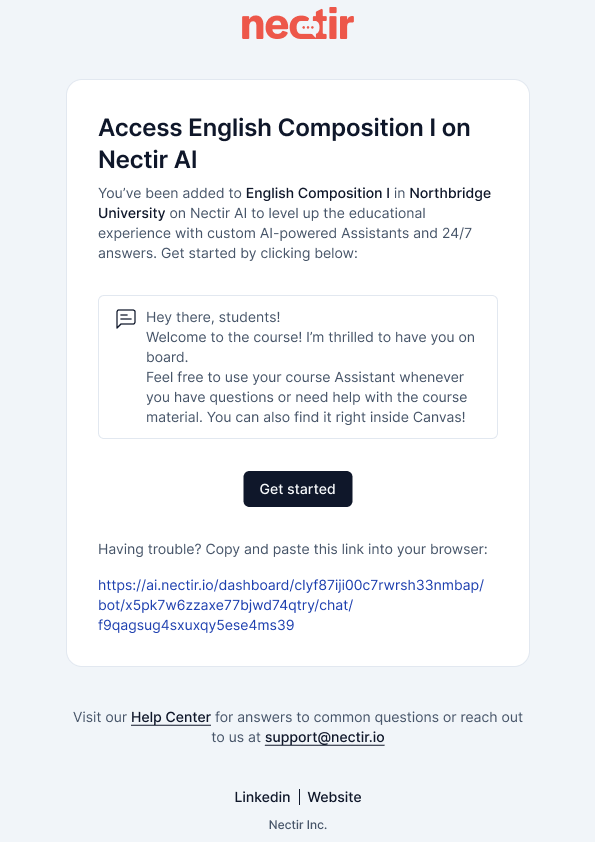
Example of invitation email with custom message
Managing Workspace Users
Changing User Permissions
Changing User Permissions
- Access your Workspace Settings by clicking the on the top left
- Click Members on the left sidebar
- Scroll or search for the user(s) you want to change (multi-select to change multiple users at once)
- Select the role you want to change the user(s) to
Removing Users from Workspace
Removing Users from Workspace
- Access your Workspace Settings by clicking the on the top left
- Click Members on the left sidebar
- Select the user(s) you want to remove (multi-select to remove multiple users at once)
- Click Remove to remove the selected user(s) from the workspace
Group-Level Invitations
How Groups Become Shared
When you invite users to a Group, it automatically changes from “Private” to “Shared”:Private
Only you have access to the Group/Assistant
Shared
At least one other person has been invited to the Group (either manually or via roster sync)
Shared with Everyone
All Workspace users can view and interact with the Group/Assistant
Note: Workspace Owners can view the usage of every Assistant in the workspace via Workspace Analytics, including Private Assistants, but cannot interact with or modify them.
Inviting Users to Groups
- Email Invitation (Recommended)
- Invitation Link
1
Access Group Menu
Hover over the Group on the left sidebar and click the three dots and select Invite Members.
2
Start Invitation Process
Click Invite members on the top right.
3
Add Email Addresses
Copy and paste users’ school-provided emails (you can paste directly from your roster - emails will be automatically extracted).
4
Select Role
Select their role permissions:
- Owner - Complete control over the Group and the Assistants
- Facilitator - Can view all settings and analytics, but cannot modify
- Member - Can only interact with Assistants
5
Customize Email and Send
- Everyone - All email addresses in your list (including previously invited users)
- New people only - Only users who haven’t been invited before
Example of invitation email with custom message
Managing Group Users
Changing User Permissions
Changing User Permissions
- Hover over the Group on the left sidebar and click the three dots and select Invite Members
- Scroll or search for the user(s) you want to change (multi-select to change multiple users at once)
- Select the role you want to change the user(s) to
Removing Users from a Group
Removing Users from a Group
- Hover over the Group on the left sidebar and click the three dots and select Invite Members
- Select the user(s) you want to remove (multi-select to remove multiple users at once)
- Click Remove to remove the selected user(s) from the Group
LTI Integration - Automatic Access
For institutions using LMS integration, users automatically gain access when they click through from your LMS - no manual invitations required.Benefits of LTI Integration:
- No manual invitations needed - Users are automatically provisioned when accessing through your LMS
- Seamless experience - Students and educators access Nectir directly from their LMS
- Automatic role mapping - LMS roles (Student, Instructor, TA, Admin) automatically map to appropriate Nectir permissions
- Consistent permissions - Maintains alignment between your LMS and Nectir roles
How LTI Integration Works
- Setup Integration: Your institution configures LTI integration with your LMS
- Configure Role Mapping: Map LMS roles to Nectir roles (one-time setup)
- Educators Enable Access: Instructors add Nectir to their course pages
- Automatic Provisioning: Users are automatically created with appropriate permissions when they access Nectir through the LMS