.imscc) from your Learning Management System into Nectir AI. After uploading, you can select specific materials from the export to add to your Assistant’s knowledge base.
Key Benefits
- Effortless content transfer: Upload your course export file once to access all your course materials
- Selective training: Choose only the specific documents you want to use for training
- Intelligent change detection: Nectir automatically identifies which files you modified when you upload a new export
- Consistent knowledge base: Keep your AI Assistant in sync with your course content as it evolves
How It Works
1
Export Your Course
Download a course export file from your Learning Management System:
2
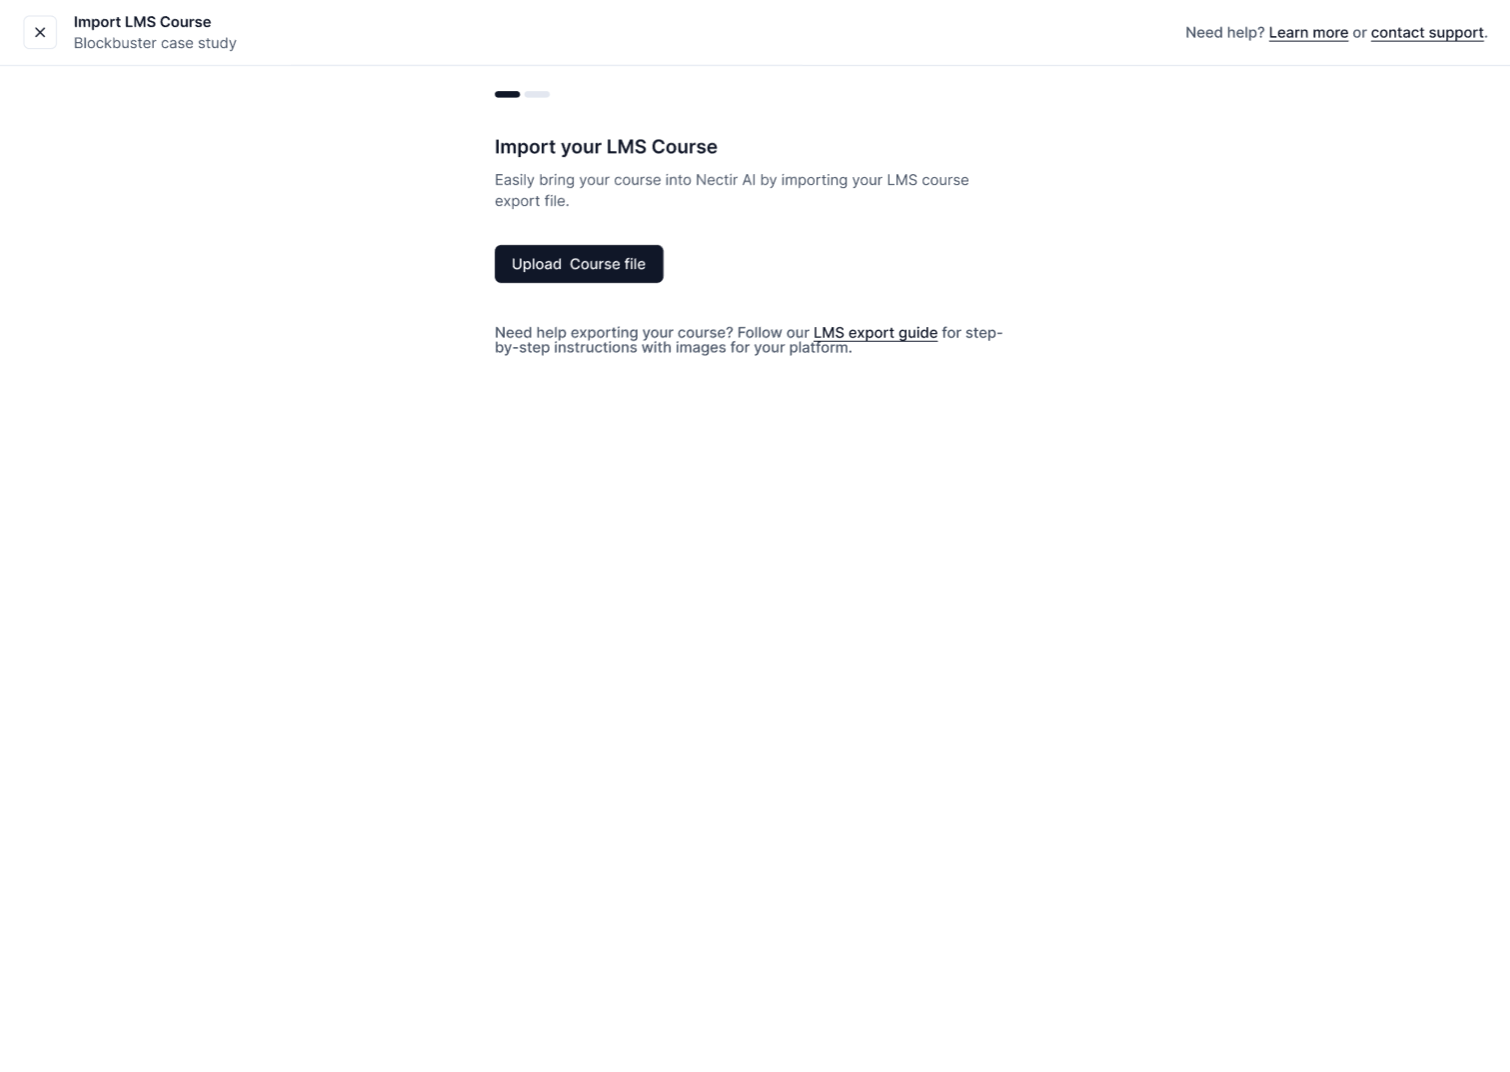
Upload to Nectir
In your Assistant’s Knowledge tab, click the “Import from LMS” button and select your course export file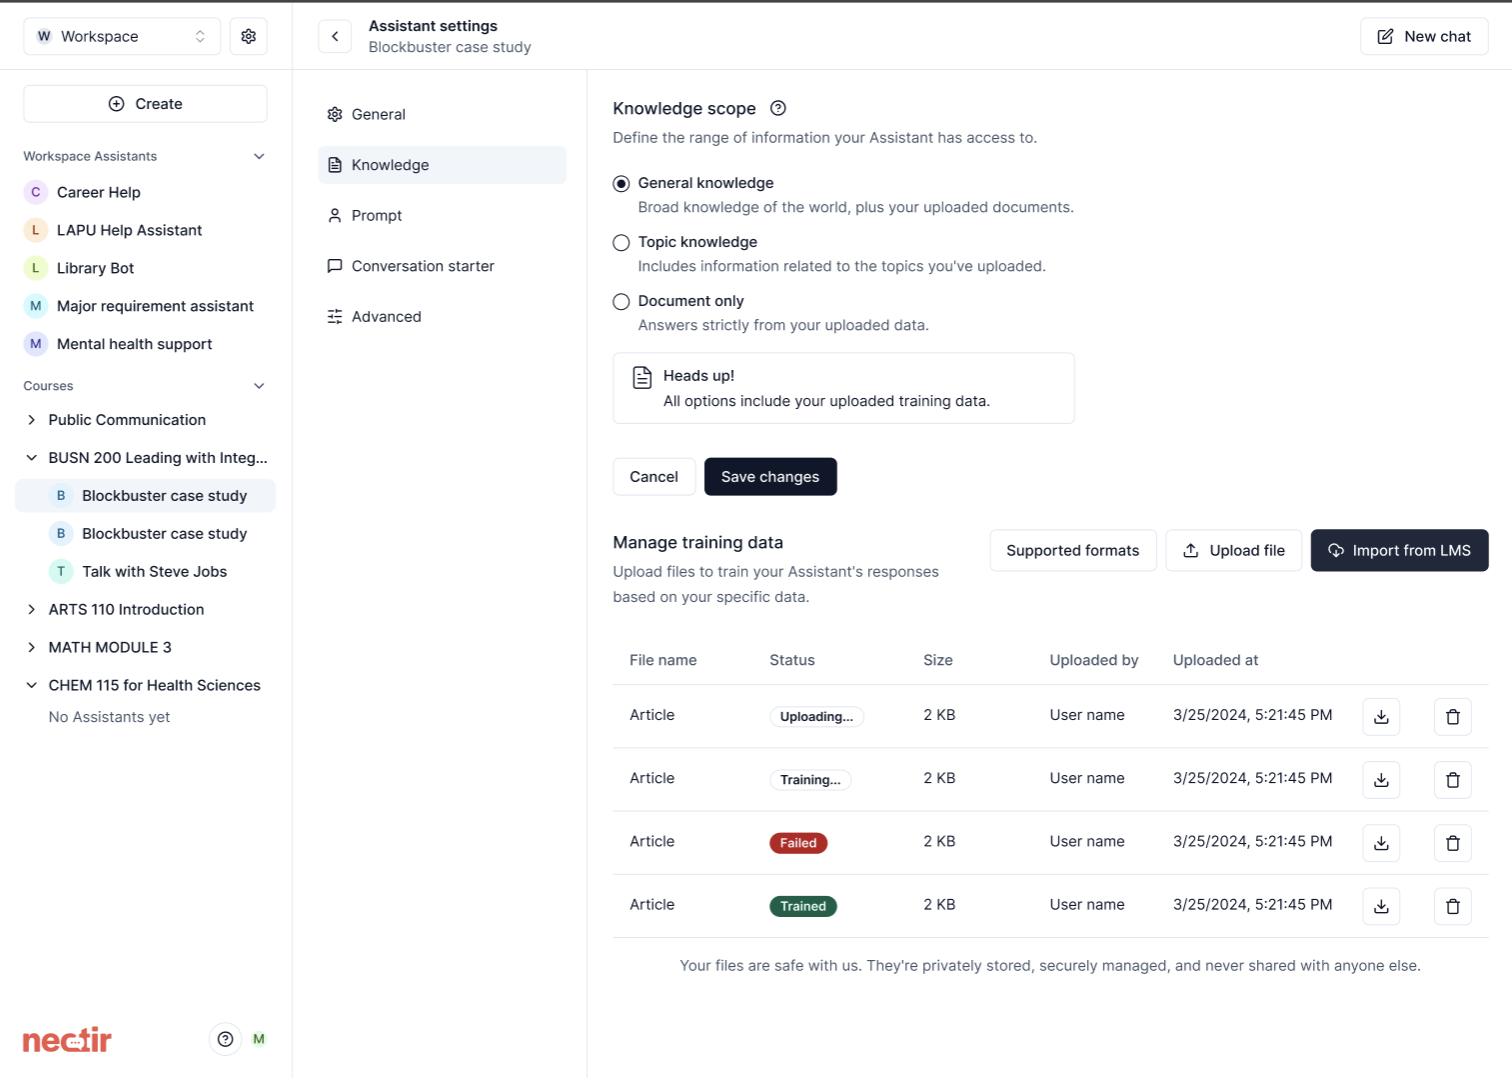
3
Processing
Nectir will process your course export, extracting and organizing all available content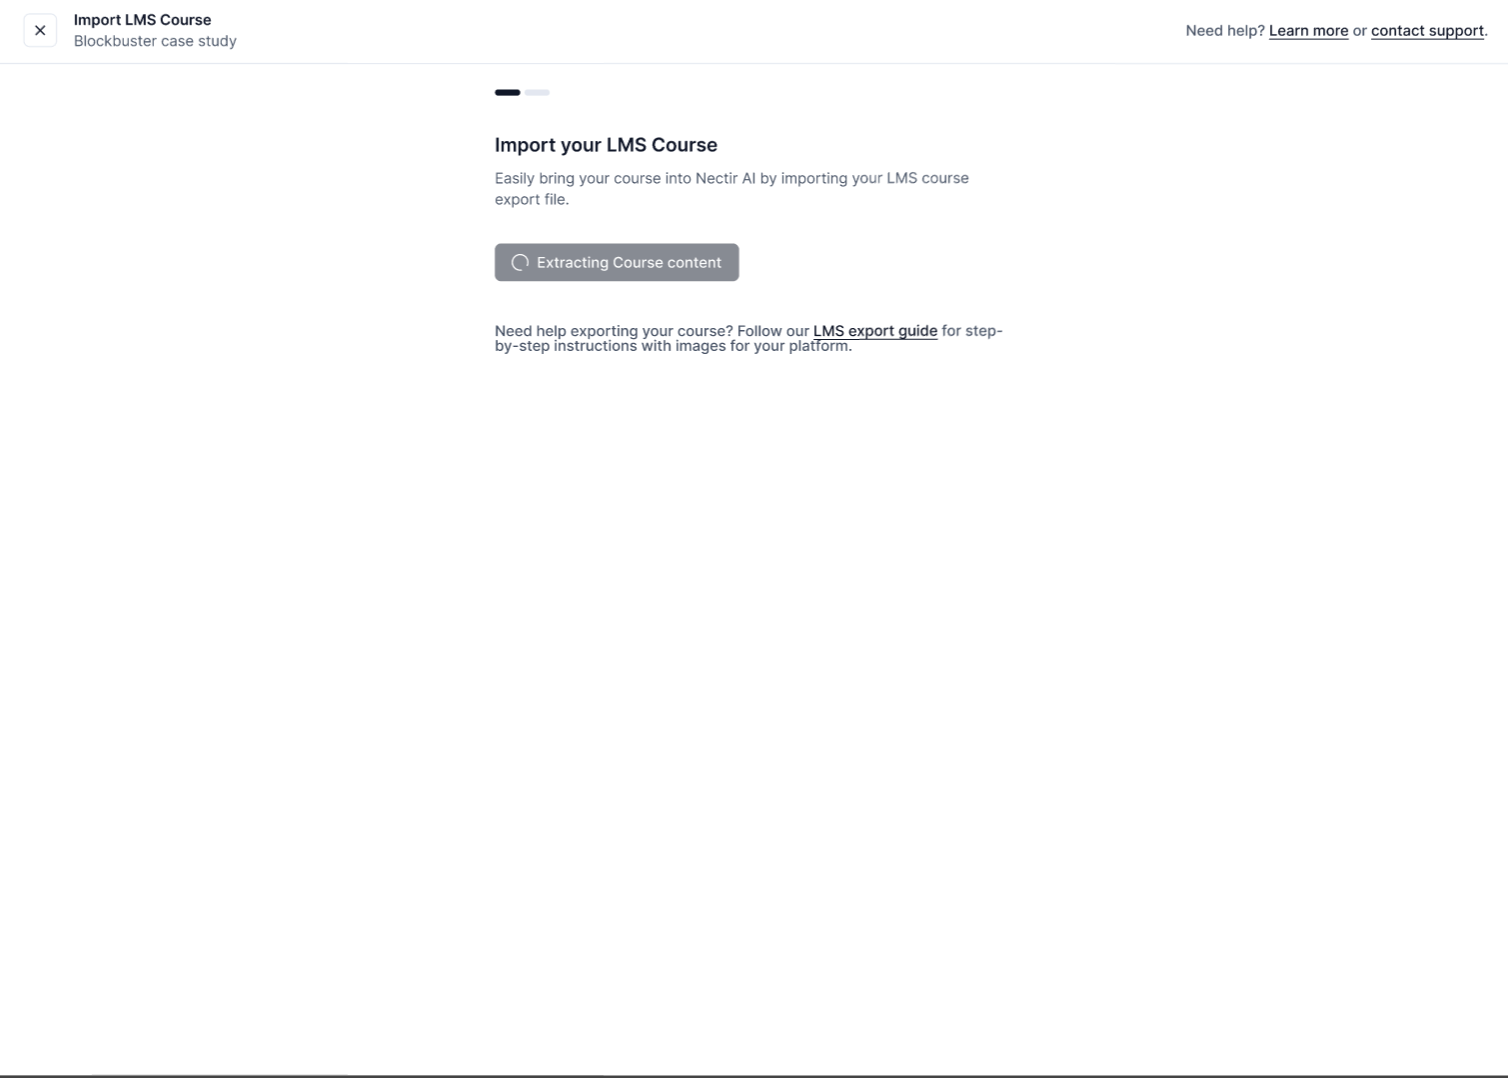
4
Select Content
Browse through your course content and select which specific files to include in your Assistant’s training data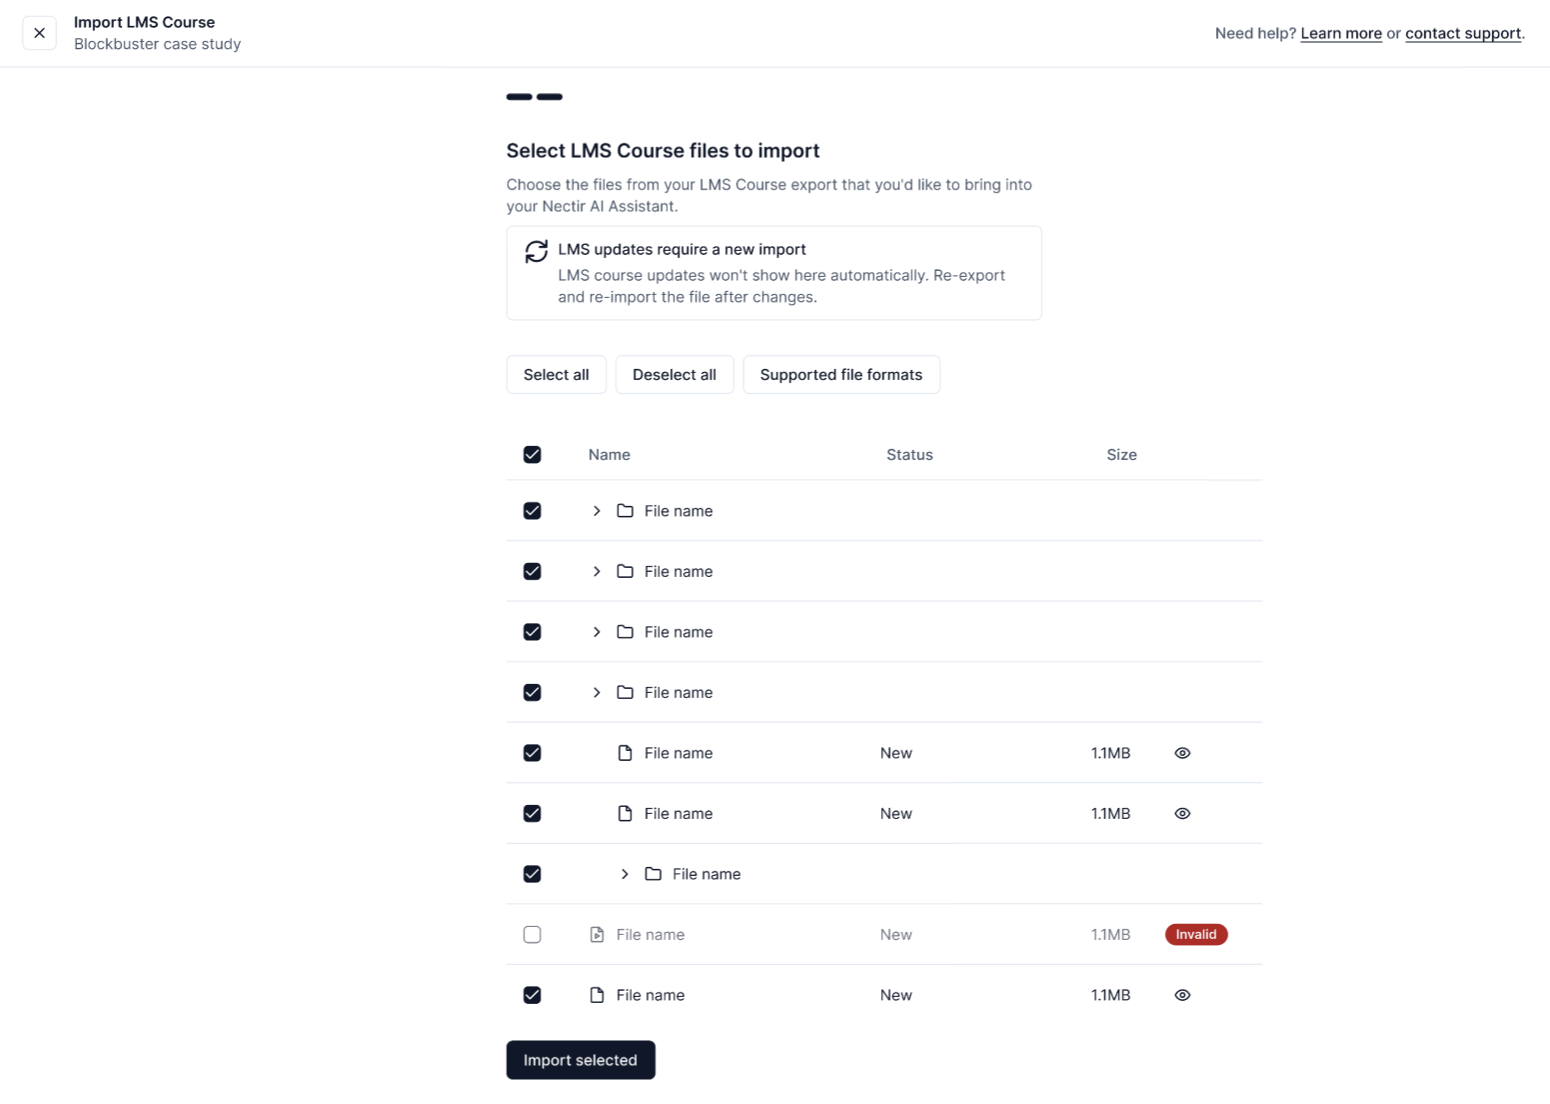
5
Start Training
Click “Import Selected” to begin training your Assistant with the selected content
After importing files from your LMS, you can manage them like any other knowledge files, including renaming, downloading, or deleting files to organize your Assistant’s knowledge base.
Managing Imported Files
After importing files from your LMS, you can manage them through the Assistant knowledge settings. You can perform three actions on your imported files using the dropdown menu that appears when you click the three dots next to any file:Renaming Files
Renaming Files
You can rename imported files to make them more descriptive and easier to identify:
1
Click the Three Dots
Click on the three dots next to the file you want to rename
2
Select Rename
Choose “Rename” from the dropdown menu
3
Enter New Name
Type the new file name in the dialog box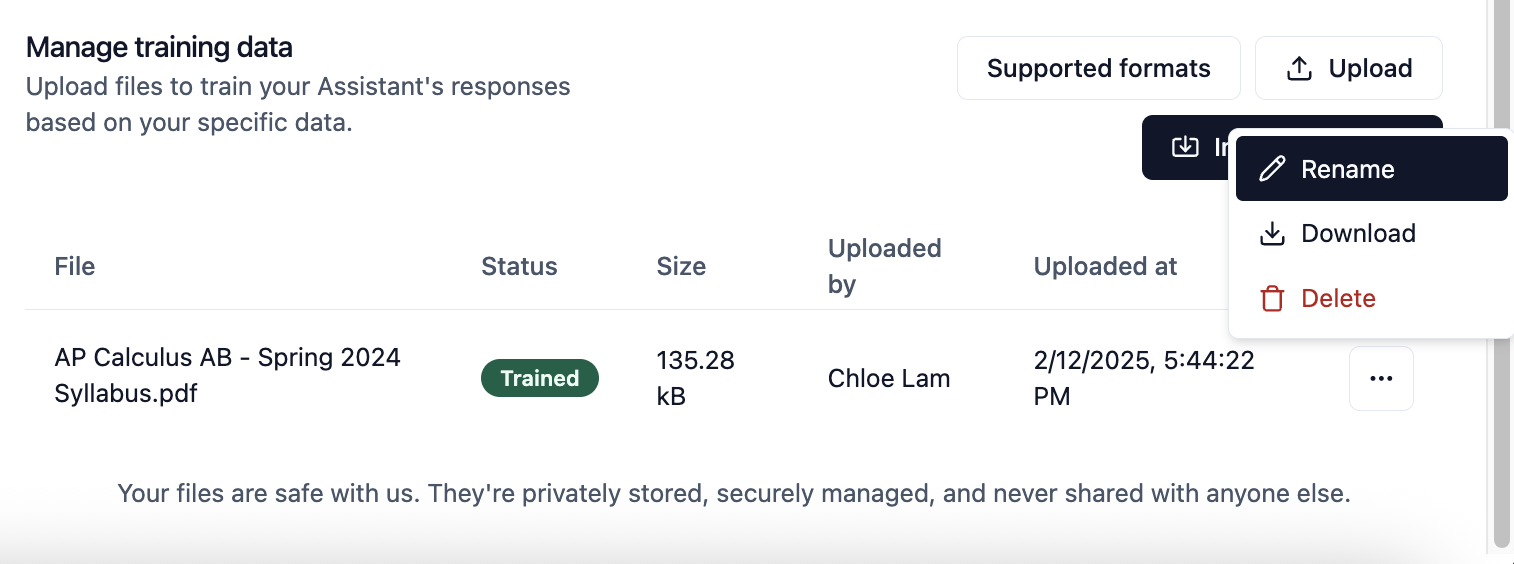
4
Save
Click “Save” to apply the new file name
Downloading Files
Downloading Files
To retrieve a copy of an imported file:
1
Select 'Download'
Choose the “Download” option from the dropdown menu
2
Save the File
Your browser will prompt you to save the file to your local device
Downloading imported files can be useful for backing up important content or making modifications to the file before re-uploading.
Deleting Files
Deleting Files
To remove an imported file from your Assistant’s knowledge base:
1
Select 'Delete'
Choose the “Delete” option from the dropdown menu
2
Confirm Deletion
When prompted, confirm that you want to remove the file
Updating Your Content
As your course evolves, you can update your AI Assistant’s knowledge base:- Download a new export file from your LMS
- Upload it to Nectir using the same process
- Nectir automatically:
- Identifies which files are new or modified
- Show changes that require review
- Maintain your previous selections where possible
When you upload a new course export, Nectir intelligently compares it with your previous upload. Only files that have changed will need to be reprocessed, saving you time and ensuring your Assistant always has the most current information.
Troubleshooting
If you’re experiencing issues with the LMS import feature, here are some common problems and solutions:Files are visible but cannot be selected
Files are visible but cannot be selected
If you can see files in your LMS export but cannot select them for import, this is typically due to one of two reasons:
-
Unsupported file format: The file may be in a format that isn’t currently supported
- Solution: Convert the file to one of our supported formats listed above
- For documents: Save or export as PDF, DOCX, or PPTX
- For media: Convert to supported image, video, or audio formats
-
File size exceeds limits: The file may be larger than our 150MB per file limit
- Solution: Compress or split the file
- For videos: Use built-in tools like iMovie (Mac) or QuickTime Player to compress
- For documents: Break large files into smaller segments
- For images: Resize or use image compression tools
Processing gets stuck or fails
Processing gets stuck or fails
If your LMS export processing stalls or fails to complete:
- Check your internet connection stability
- Try uploading a smaller export first to test the system
- Ensure your export file isn’t corrupted (try re-exporting from your LMS)
- If the problem persists, contact support with details about your export file type and size
Content is imported but not appearing in training
Content is imported but not appearing in training
If content appears to import successfully but doesn’t show up in your Assistant’s knowledge:
- Confirm you clicked “Import Selected” after selecting files
- Check that the training process completed (green “Trained” status)
- Try a simple test question that specifically references the imported content
- Verify that your Assistant’s knowledge scope is set appropriately
Next Steps
Knowledge Scope
Configure the boundaries of information your Assistant can access
Assistant Prompt
Set the directions that shape your Assistant’s behavior
Video Tutorial
See LMS Import in Action
Watch how to import content from your Learning Management System